How to create and set up email in cPanel (WHM)
On the cPanel start page, there is a separate section containing tools for working with email. In this article, we will look at how to create an email on your own domain using these tools, as well as mastering mailbox management and changing its parameters.
How to create an email account
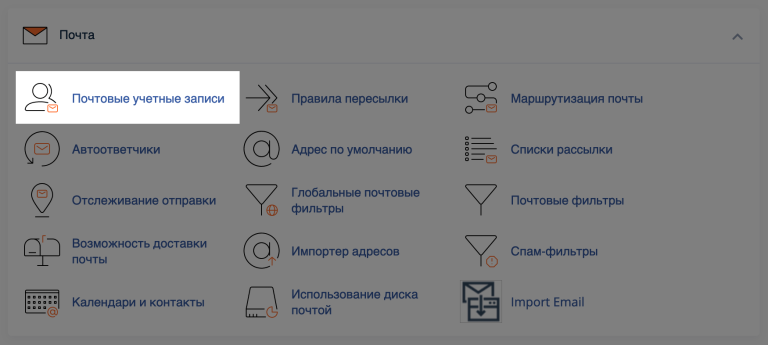
On the cPanel start page, locate the "Email" section and go to the "Email Accounts" application.
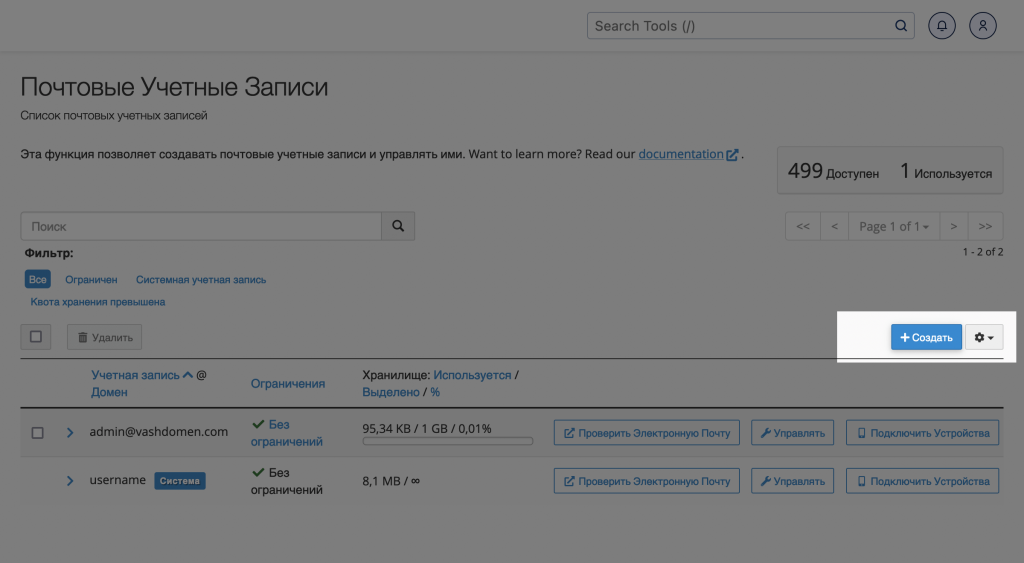
On the next screen, click the "Create" button located on the right under the search bar.
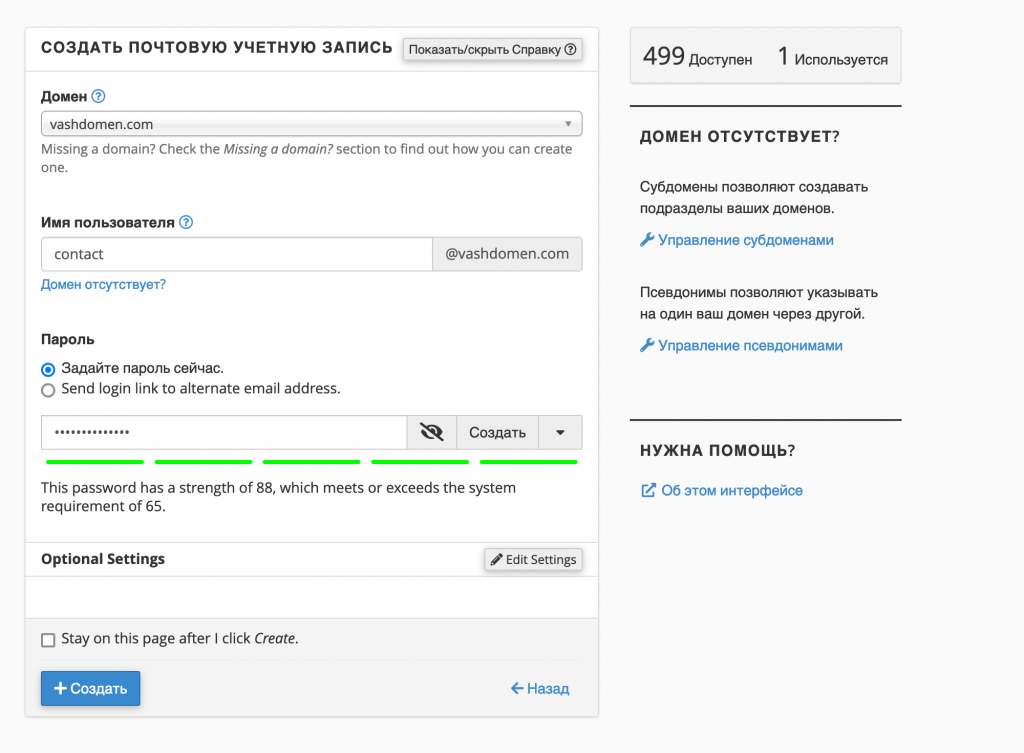
The email account creation wizard will start. If you have multiple domains in cPanel, select the one you need from the drop-down list, then come up with a name for the mailbox (the part before @) and a password for it.
On the cPanel home page, there is a separate section containing tools for working with email. In this article, we will show you how to create an email on your own domain using these tools and learn how to manage your mailbox and change its settings.
How to create an email account
On the cPanel home page, find the "Email" section and go to the "Email Accounts" application.
On the next screen, click the "Create" button located to the right of the search bar.
The email account creation wizard will start. If you have multiple domains in cPanel, select the one you need from the drop-down list, then come up with a name for your mailbox (the part before @) and a password for it.
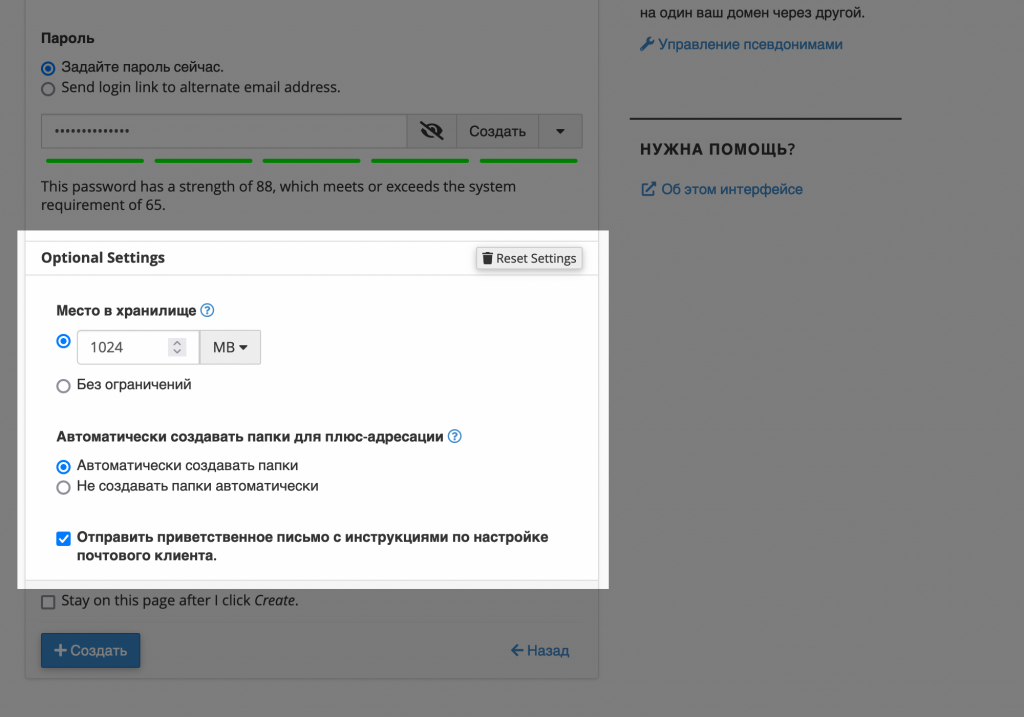
Under the "Password" field, there is a section of additional settings - "Optional Settings". Here you can change the allocated mailbox memory, configure plus addressing, and enable/disable a welcome message with instructions on how to set up email.
If you are not familiar with plus addressing and do not plan to use it, leave the toggle switch in this option in the default position. You probably won't need this setting.
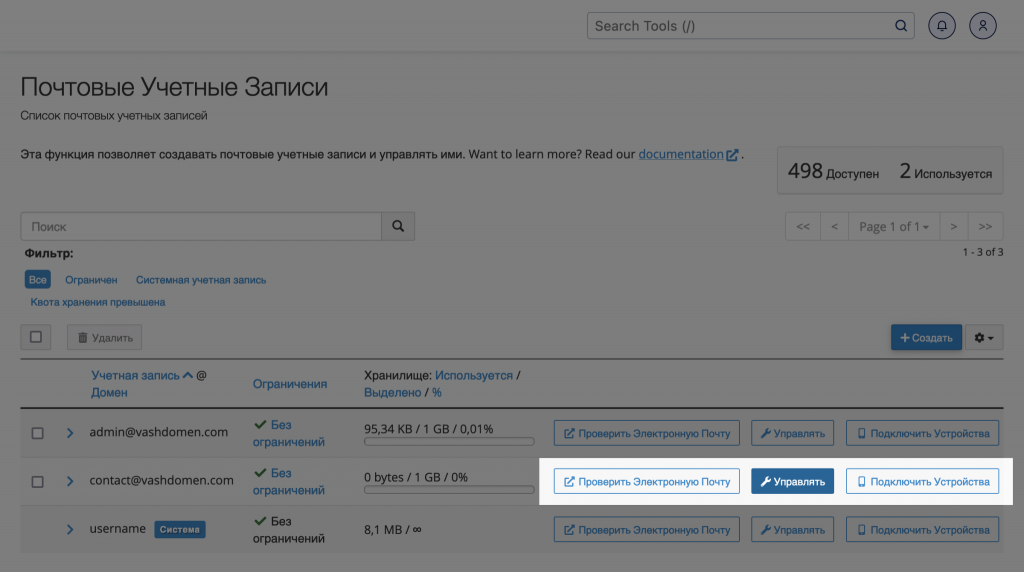
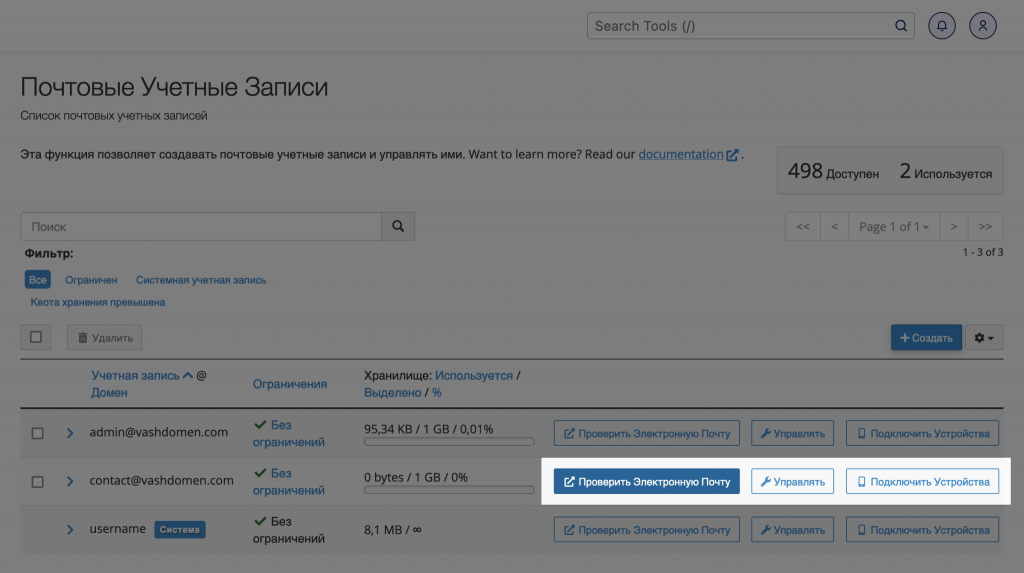
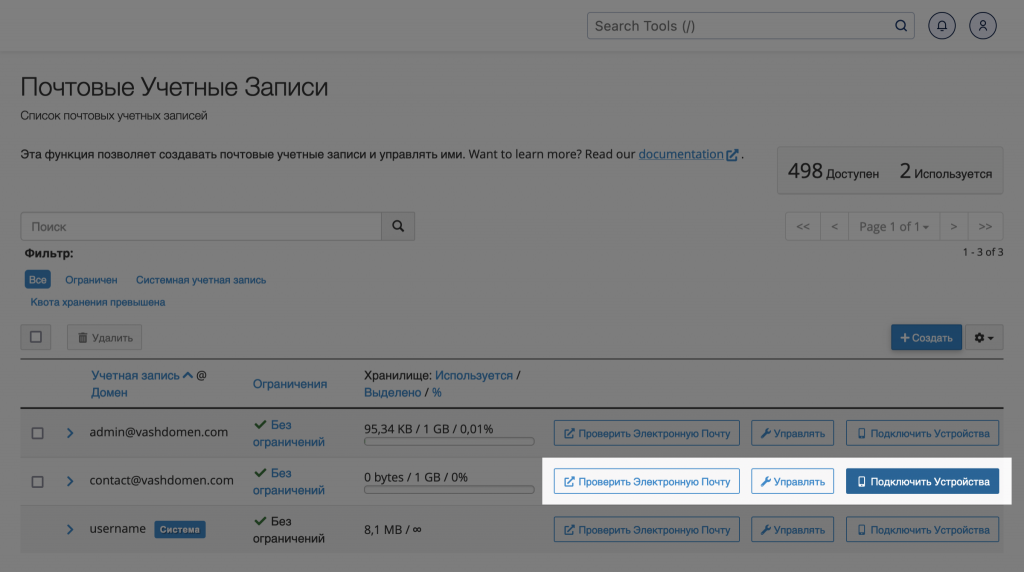
After clicking the "Create" button, you will return to the main page of the "Email Accounts" application. Your new mailbox will appear in the table at the bottom of the screen.

How to change email settings
On the main page of the "Email Accounts" application, find the mailbox you need in the table and click on the "Manage" button in the row with it.
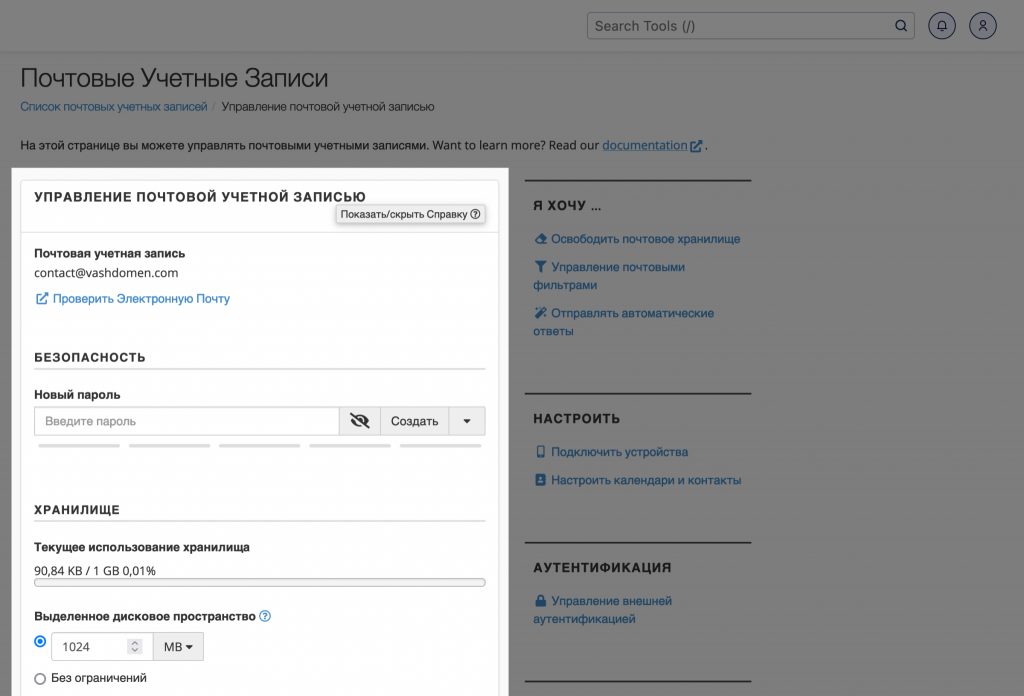
A section for managing the mailbox will appear. On the left side of the screen, you can change the password and the memory allocated to the mailbox. It will also show you how much memory is used and how much is still available.
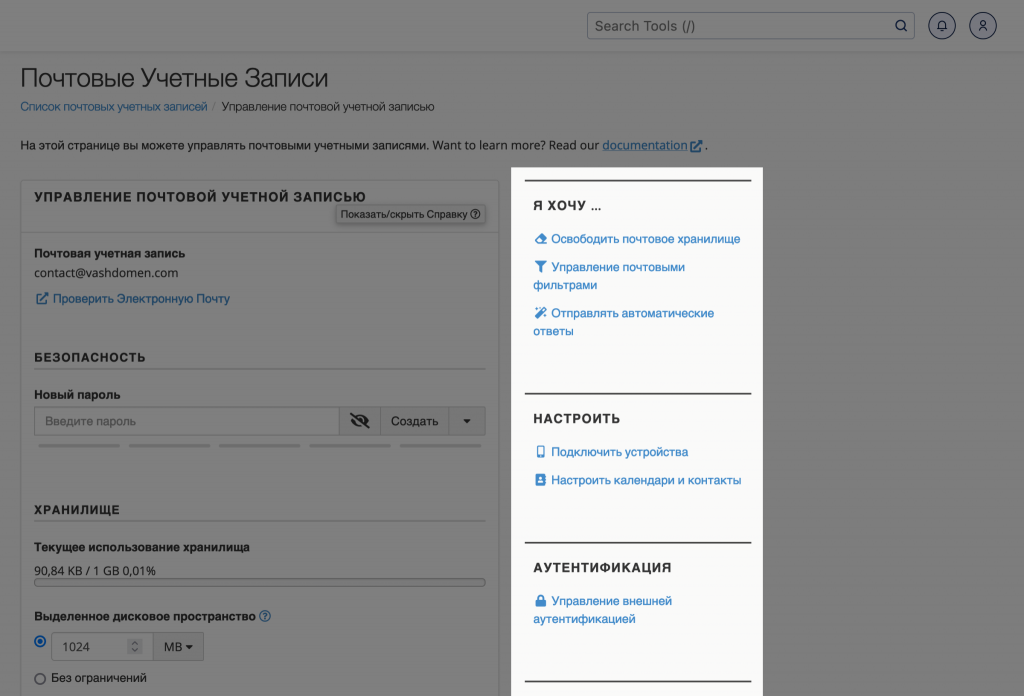
On the right sidebar, you will see links to other cPanel applications that will allow you to fine-tune your mailbox:
- Free up mailbox storage - here you can delete emails from specific folders based on predefined conditions.
- Mail filters management - here you can create rules for incoming emails to be rejected or placed in specially created folders.
- Automatic response sending - here you can create ready-made responses to incoming emails. For example, you can inform that the order has been accepted for processing or that you are on vacation and will respond later.
- Device connection - a section with details on connecting your mailbox to third-party applications for email management (Outlook, Apple Mail).
- Calendars and contacts setup - a section with details on connecting your calendar and address book to third-party applications (Outlook, Apple Mail).
- External authentication management - a section with parameters for authorization in the mail using accounts on third-party services.
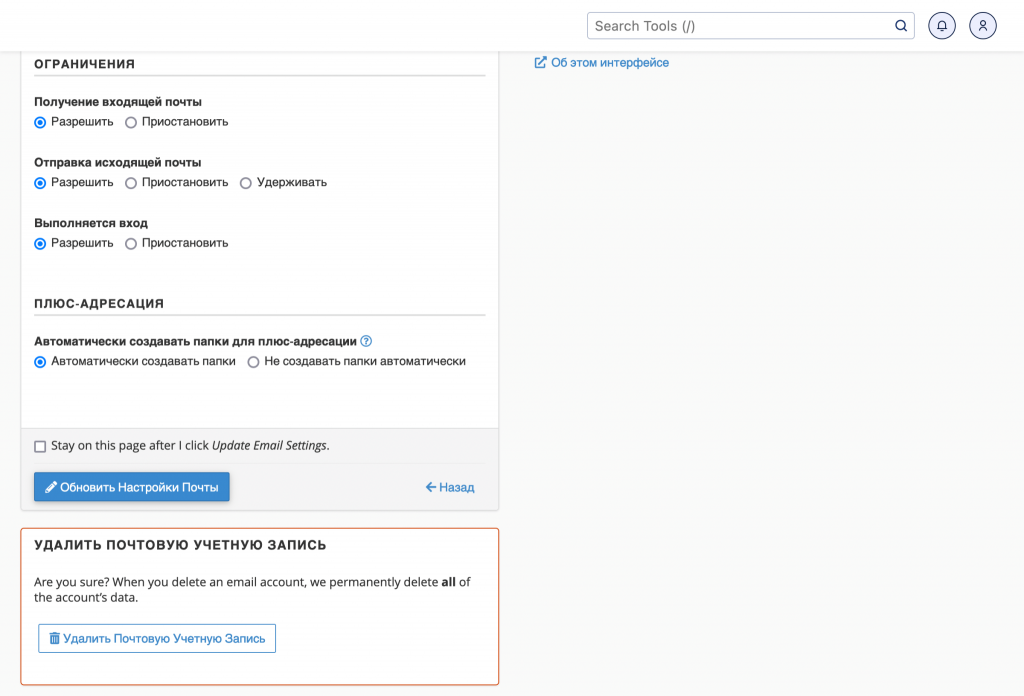
Scroll down the page, and you will see additional settings. With their help, you can temporarily suspend the operation of the entire account, as well as incoming or outgoing mail separately from each other.
Here you can also change the plus addressing settings if you decide to use this technology in the future.
At the bottom of the page, you can delete the mailbox if it is no longer needed.
To work with email, you can manage your mailbox in the built-in free email client or connect your email to your favorite email client on your computer, such as Microsoft Outlook or Apple Mail.
If you want to work with email in your browser, find the necessary mailbox in the "Email Accounts" application table and click the "Check Email" button in the row with it.
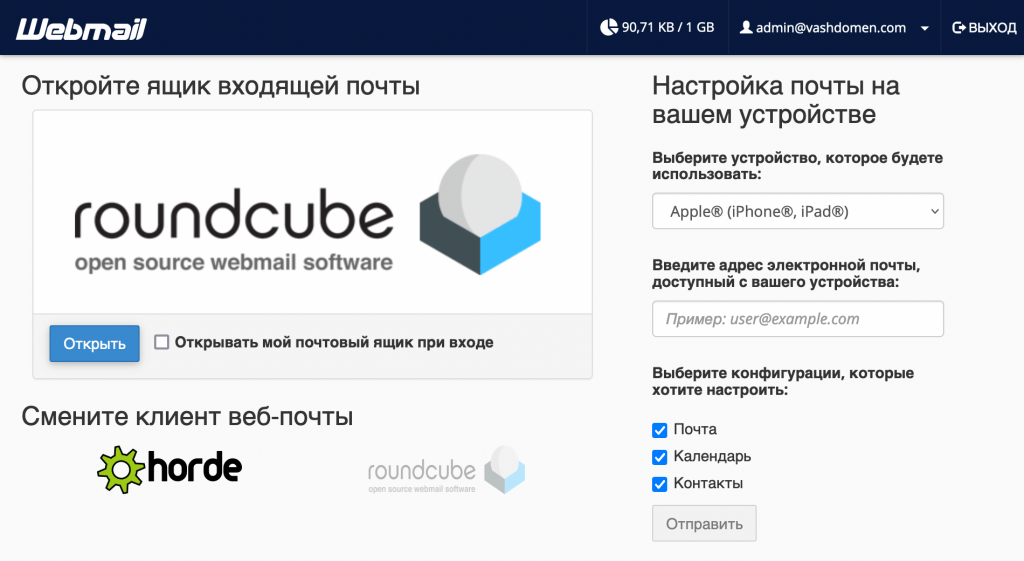
On the next page, you will see the logos of two built-in cPanel email clients - Roundcube and Horde, in which you can work with email. By default, the Roundcube client is selected. If you want to switch clients, click the Horde logo. To launch email, click the "Open" button.
Roundcube has a universal interface for an email client, but by default, it is in English. To set the Russian language, go to the "Settings" - "User Interface" section on the side panel. Then in the "Language" option, find "Russian" in the drop-down list and save the changes.
To exit the settings, go to the "Mail" section on the side panel. Just to be sure, test the email by sending a message to your personal address or, conversely, sending a test message to the domain email.
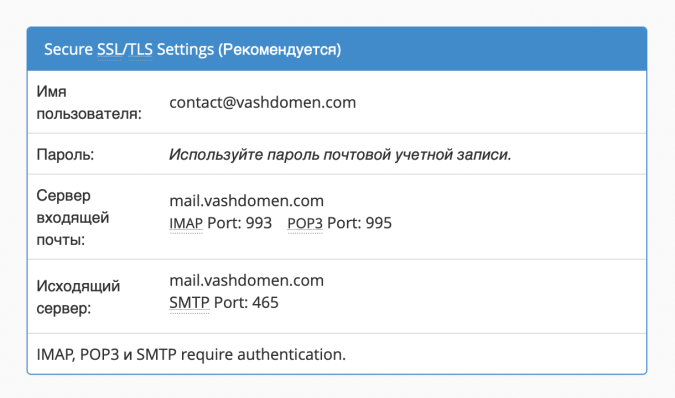
If you want to connect the mail to your favorite email client, you will need the mail server address, IMAP/POP3 and SMTP port numbers.
You can find this information in the "Connect Devices" section of the "Mail Accounts" app. Find the blue banner that lists all the necessary connection details.