Setting Up Website Hosting in ISPConfig
To host your website on a server using ISPConfig, initially [create a new user](/help/ispconfig/creating-ispconfig-accounts/) and log in to the control panel using their credentials (go to the "Client" section and click on the green login icon next to the relevant user, then confirm the login by clicking "Yes, login as a client").
Next, follow these steps:
Domain
- On the side of the NS (Name Server) holder for your domain, set up an A-record for your domain, pointing to the IP address of your server.
- Go to the "Sites" section and click "Add new website."

- In the appearing form on the "Domain" tab, specify the domain name, select the PHP mode, and PHP version.
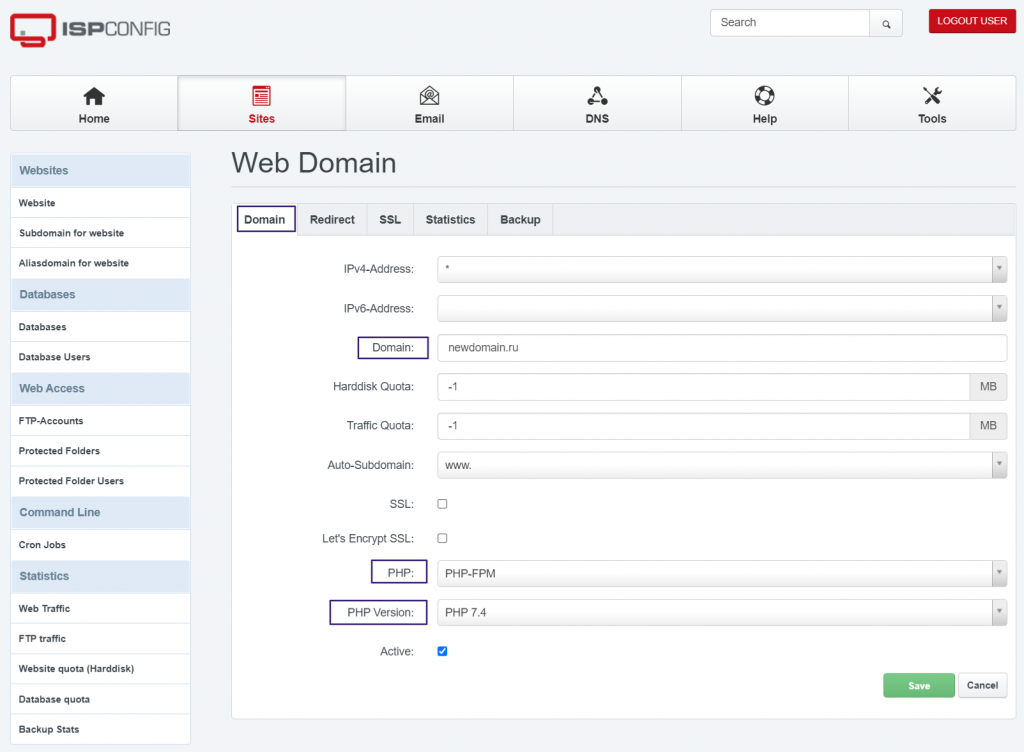
Additionally, on other tabs, you can configure the following settings: - On the "Redirect" tab, set up redirects. - On the "SSL" tab, add an SSL certificate. - On the "Statistics" tab, connect Awstats or another statistics gathering tool. - On the "Backup" tab, set the backup interval for your site and the number of retained copies. By default, you can leave the settings unchanged and make modifications as needed.
- After completing the configuration, click "Save."
Website Files
To upload files for your website to the server, start by creating an FTP user.
- Go to the "FTP-Accounts" section and select "Add new FTP user."

- On the opened page, select the site for which you're creating the FTP user and specify the username and password for the user. The username will always start with the panel username.

- Click "Save."
- Afterward, connect to the server via FTP using the provided credentials and upload your files to the "web" directory.
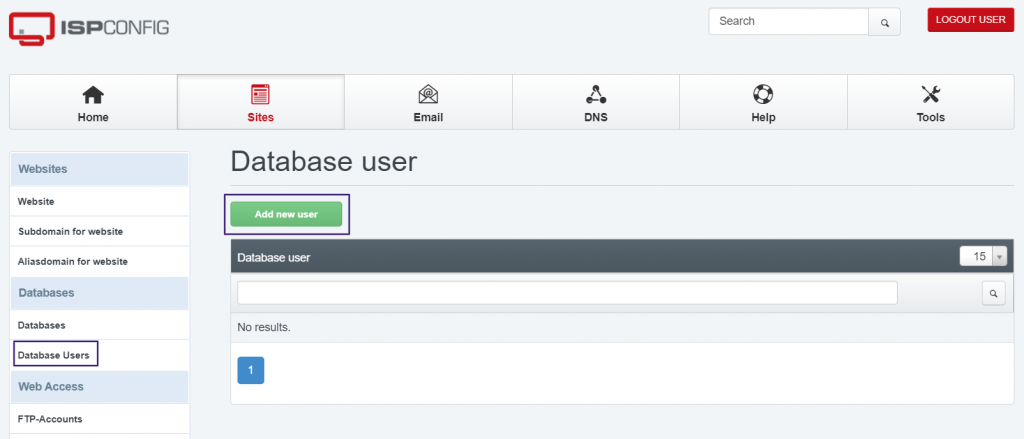
Database
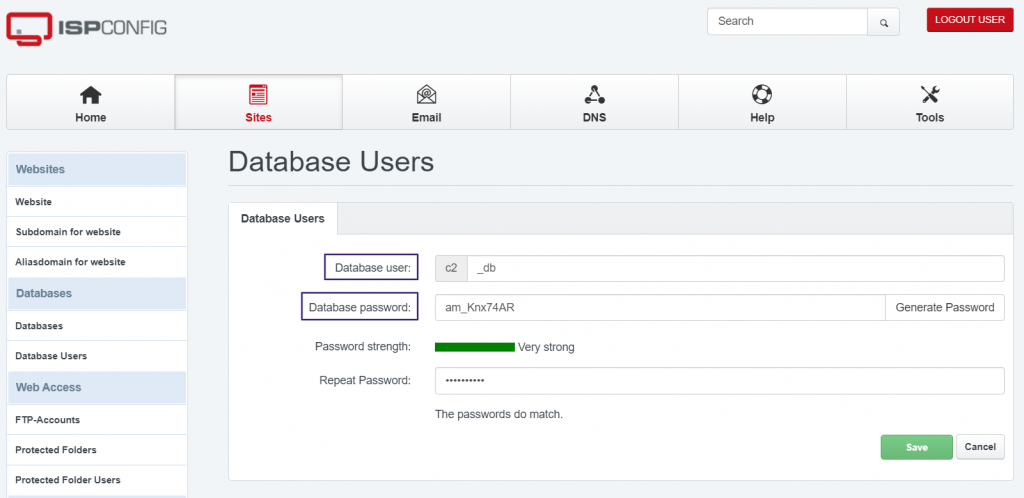
- Navigate to the "Database Users" section and select "Add new user."
- Configure the database username and password, then click "Save."
- Proceed to the "Databases" section and choose "Add new database."

- In the opened form:
-
- Select the website for which you're creating the database.
- Set the database name.
- Choose the database user you created earlier.
- Select the required encoding.
- If necessary, enable remote database access and specify the remote IP address to restrict access.
- Click "Save."

- Go to the following address: http://IP_server_address:8081/phpmyadmin and log in to phpMyAdmin using the credentials of the created user.
- If necessary, import the database dump.
- In your website's configuration files, update the credentials for connecting to the database (database name, database username, and password).
Check the functionality of your website.

