Mail Server Configuration
Follow this guide to configure email on your server. To set up your DNS servers based on the domain in ISPmanager, please use the following instructions.
Activating OpenDKIM
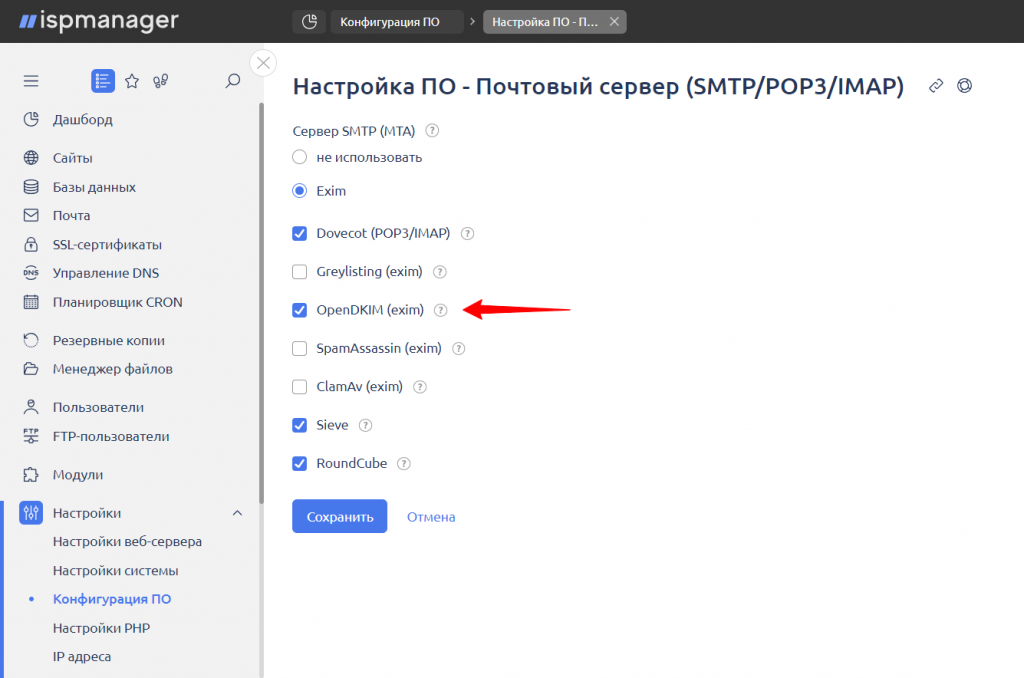
- Open the "Settings" section and navigate to "Software Configuration."
- Find the "SMTP/POP3/IMAP Mail Server" item, and double-click on it (or select it and click "Edit" in the top menu).

- Activate the "OpenDKIM (exim)" option and save the settings.
Adding an Email Domain
To work with email, you need to add an email domain (this might have been done when creating a new user if you selected the "Create an email domain" option).
Adding an email domain can be done both as the root user and as a regular user. The process is done through the "Mail" section - "Email Domains" - "Create Email Domain."

In the opened form, please fill in the necessary fields:

- Name — the domain name.
- Owner (only available for root) — the user to whom the new domain will belong.
- Default action — you can choose how to handle emails sent to a non-existent mailbox on the specified domain.
Options:- Notify of error — the sender will receive a notification that the mailbox does not exist, and the email will be deleted.
- Ignore and delete — the sender will not receive a notification, and the email will be deleted.
- Forward to an address — you can specify the email address to which such emails should be forwarded.
- Forward to a domain — you can specify the email domain to which such emails should be forwarded.
- Enable DKIM for the domain — check the box.
- Enable DMARC for the domain — check the box.
- SSL Secure Connection — check the box.
- SSL Certificate — select "New SSL Let's Encrypt."
- Alias for the certificate — leave it unchanged (by default, a subdomain like mail.yourdomain will be specified).
- Email — enter your contact email.
To complete the setup, before saving the changes in the ISPmanager panel, create a subdomain mail.yourdomain using your NS server holder's tools and specify the server's IP address as an A record for this subdomain.
If your domain was registered through us, you can create a subdomain and configure the A record in the control panel at 1host.kz/bill under "Domains."
Click "Create."
You will then go to the certificate issuance page, where all fields will be automatically filled in - simply click "Issue."
Setting Up DNS Records for the Domain
After creating the email domain, it's important to correctly configure the DNS records for your domain: MX, SPF, DMARC, and DKIM.
- In the ISPmanager control panel, go to the "DNS Management" section.
- Select the created email domain and click "Manage DNS Records."
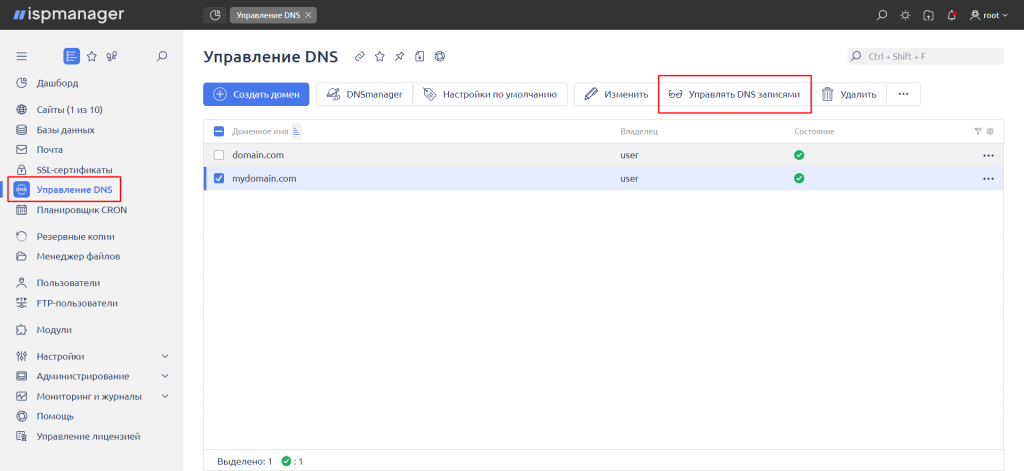
- Find the MX, SPF, DKIM, and DMARC records in the list - you will need to create these records with the corresponding values on the NS server holder's side.
MX
- Go to the 1host.kz/bill/ panel and navigate to the Domains section.
- Click on the gear icon next to the relevant domain and select "DNS Settings."
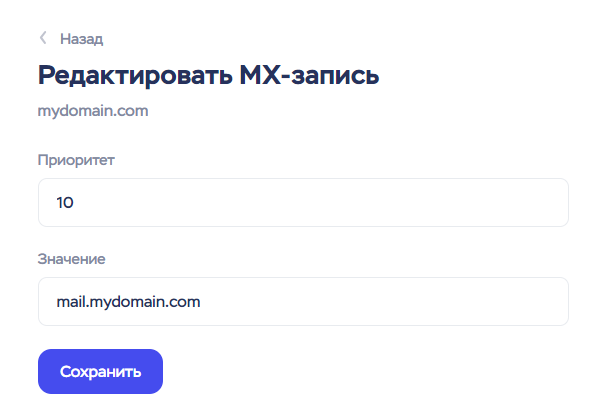
- Create a new MX record or edit an existing one by clicking on it. Specify the following data from ISPmanager:
- Priority of the MX record.
- Value of the MX record (should look like mail.yourdomain.com). Do not add a period at the end of the domain.
- If you have other MX records, delete them.
SPF
An SPF record defines a list of servers authorized to send emails on behalf of your domain.
To configure SPF:
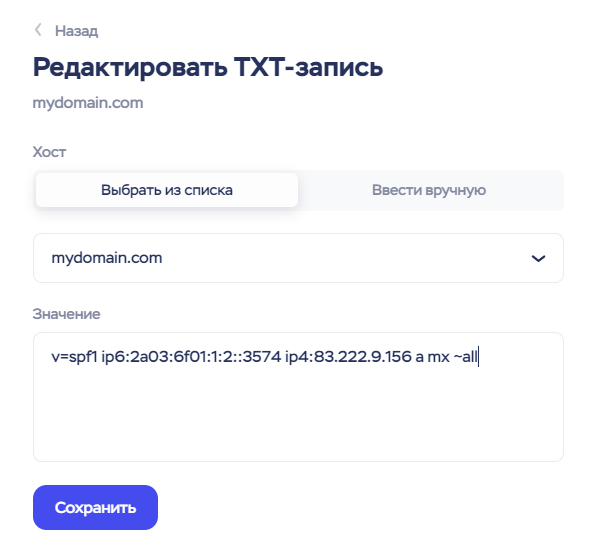
- Copy the SPF record value from ISPmanager, which starts with v=spf1.
- Go to the 1host.kz/bill/ panel and navigate to the "Domains" section.
- Click on the gear icon next to the relevant domain and select "DNS Settings."
- If you already have a TXT record with the parameter v=spf1, edit it by clicking on it. If there is no such record, click "Add DNS Record" in the upper right corner and choose "TXT."
- Leave the "Host" field empty in the DNS record settings window.
- Paste the SPF record value from ISPmanager into the "Value" field.
DKIM
- Copy the DKIM record value from ISPmanager, which starts with v=DKIM1.
- Go to the 1host.kz/bill/ panel and navigate to the "Domains" section.
- Click on the gear icon next to your domain and select "DNS Settings."
- If you already have a TXT record with the parameter v=DKIM1, edit it by clicking the pencil icon. If there is no such record, click "Add DNS Record" in the upper right corner and choose "TXT."
- In the DNS record settings window, select "Specify Manually" for the "Host" field and enter dkim._domainkey.
- Paste the copied DKIM record value from ISPmanager into the "Value" field.

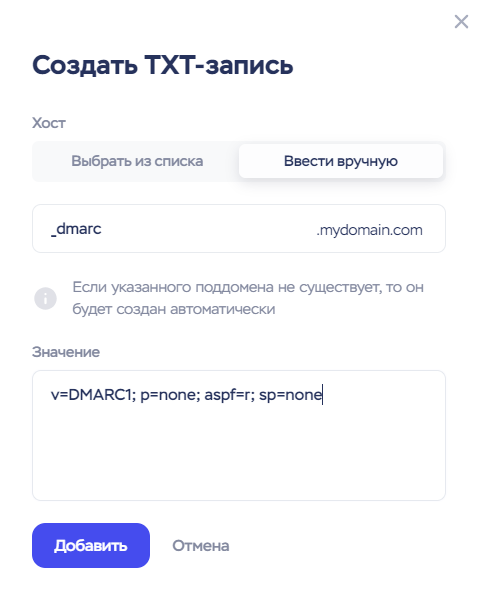
DMARC
- Copy the DMARC record value from ISPmanager, starting with v=DMARC1.
- Go to the 1host.kz/bill/ panel and navigate to the "Domains" section.
- Click on the gear icon next to your domain and select "DNS Settings."
- If you already have a TXT record with the parameter v=DMARC1, edit it by clicking the pencil icon. If there is no such record, click "Add DNS Record" in the upper right corner and choose "TXT."
- In the DNS record settings window, select "Specify Manually" for the "Host" field and enter _dmarc.
- Paste the DMARC record you copied from ISPmanager into the "Value" field.
Creating an Email Mailbox
To create an email mailbox, go to the "Mail" section and select "Create Mailbox."

In the opened form, fill in the following fields:
- Name — this is the name of the mailbox, which will appear before the @ symbol. For example, admin, info, support, and so on. You can use Latin letters, numbers, hyphens, and periods in the name.
- Domain — specify the domain on which the mailbox will be created (what comes after @).
- Password — enter or generate a password for the mailbox.

Additionally, you can specify the following additional parameters:
- Alias — the ability to specify additional names for your mailbox. For example, if you specify "sales," all emails sent to sales@mydomain.com will be delivered to the mailbox you are creating now. Multiple aliases can be specified separated by spaces. Do not include the domain, as all settings will only apply to the domain in the "Domain" field.
- Send copies to email — you can specify mailboxes to which copies of all incoming emails to the created mailbox will be sent.
- Max. Size — you can specify the maximum size for your mailbox.
- Comment — you can add any additional information here.
After entering the necessary settings, click "Create."
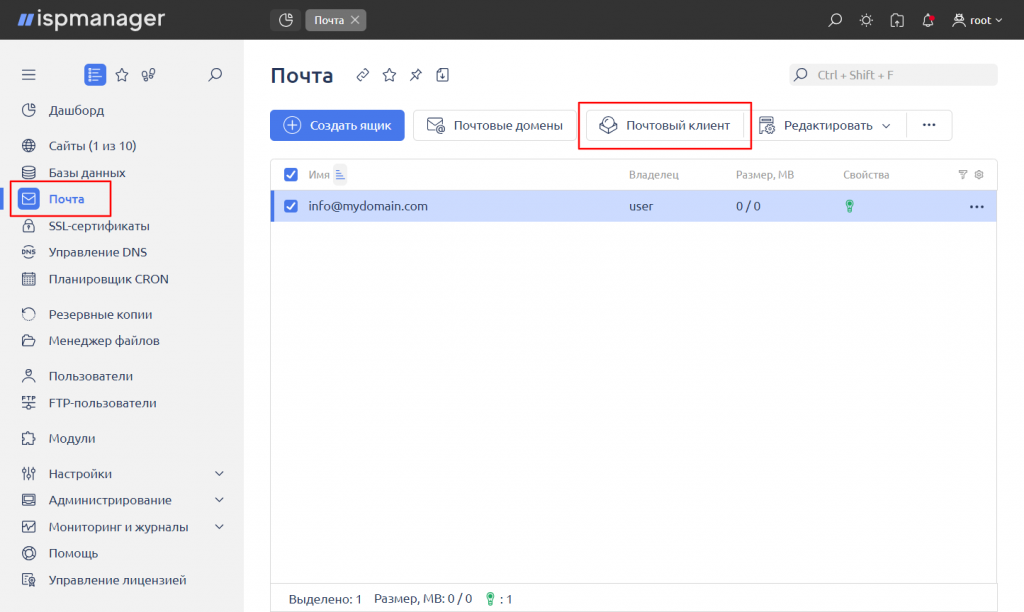
Email Client
To actively work with your email, you need to add the mailbox to an email client.
You can use the Roundcube web interface, which is integrated into ISPmanager. To access Roundcube, go to the "Mail" section, select the created mailbox, and choose "Email Client."
You will be redirected to the Roundcube interface.
Additionally, you have the option to use another email client. The necessary settings for this client can be found in the "Mail" section. Select the required mailbox, then click on the three dots in the upper right corner and select "Settings for Email Clients."

In the opened window, you will find all the necessary information to configure your email client.


