Managing SSH Access Keys for Your cPanel Web Hosting Account
Secure Shell (SSH) is a network protocol that allows remote servers to receive commands or files. The SSH protocol follows the client-server communication model, meaning that an SSH client is needed to connect to the SSH service running on a server. Unlike other communication protocols, SSH encrypts communication using cryptographic keys, making it a secure option.
The SSH protocol requires authentication, and one way to authenticate is by using cryptographic keys. To generate these keys, access to the SSH service is typically required. However, cPanel makes it easy for users to generate SSH keys by providing an interface for key creation. Once a key is generated, cPanel creates both the public and private key. The public key is stored on the server while the private key is downloaded and imported into the user's SSH client. During an SSH login attempt, the public and private key are compared, and if they match, the user is authenticated.
Here is how you can manage SSH Access keys in your cPanel Web Hosting account.
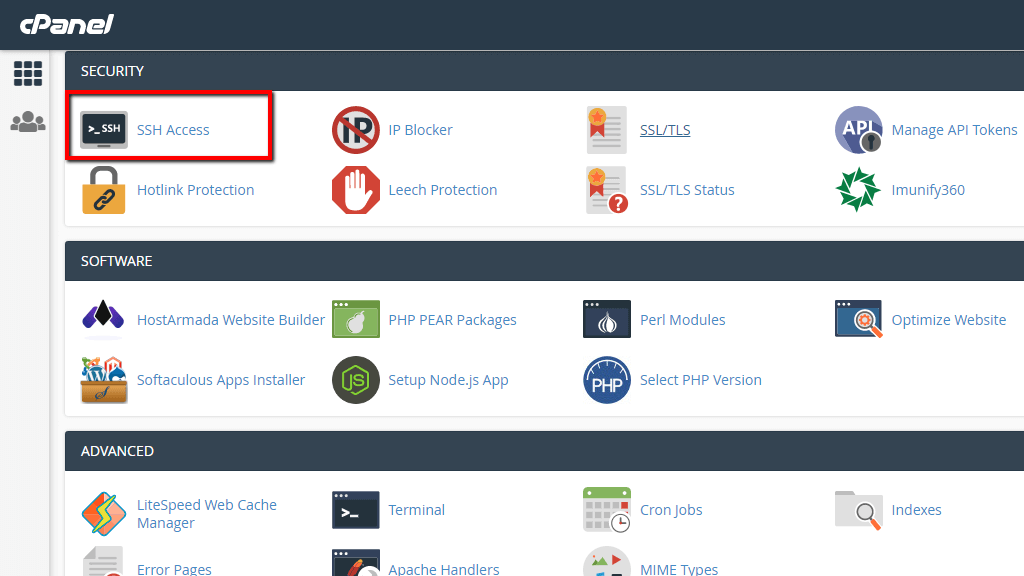
Accessing the SSH Access feature in cPanel
To access the SSH Access feature, log in to your cPanel Web Hosting account, and use the search functionality at the top of the page or look for the "Security" feature group where you will find the "SSH Access" feature.
Generating a new SSH Key
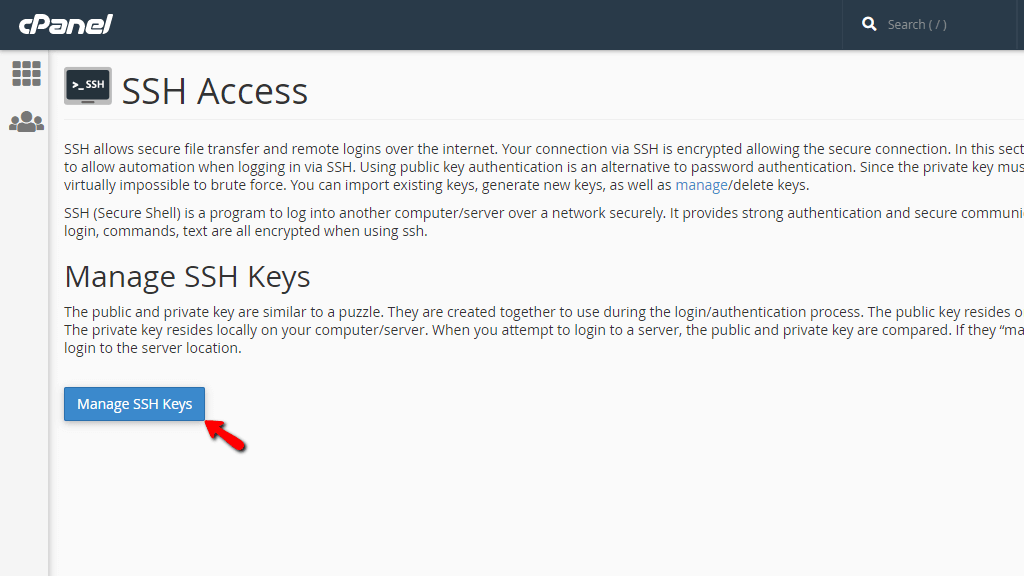
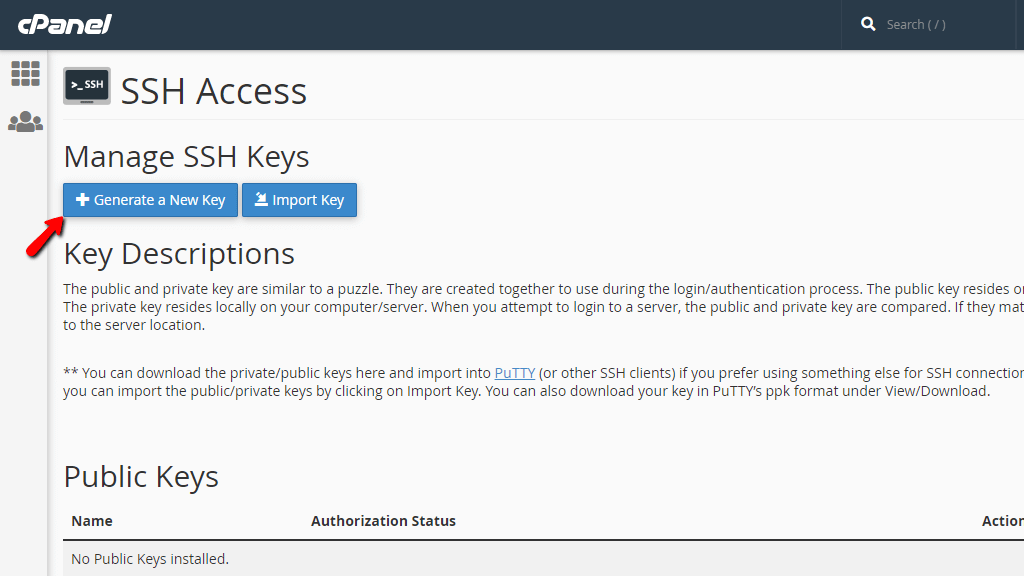
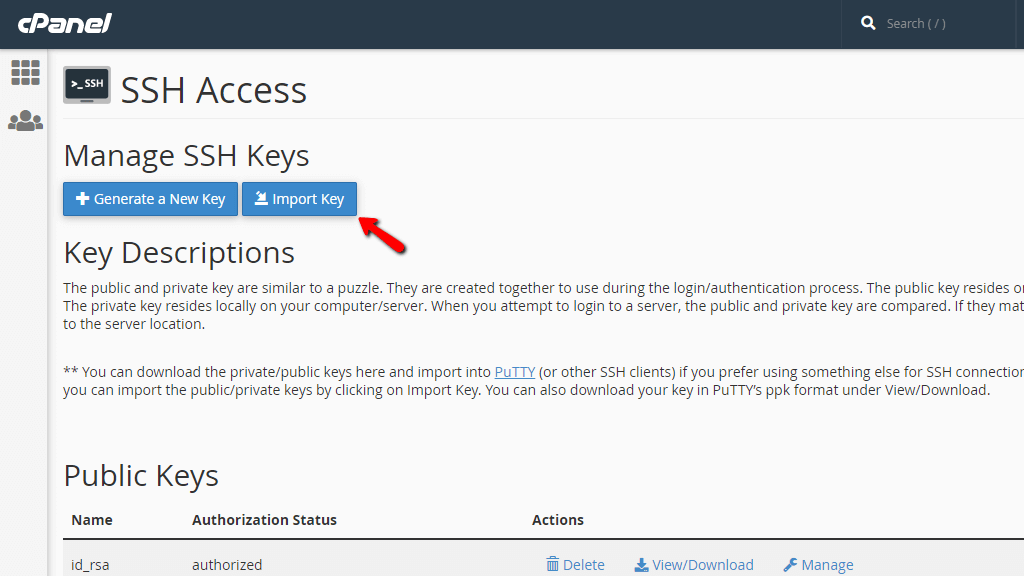
Click on the "Manage SSH Keys" button from the default page of the "SSH Access" feature. You will then be redirected to a page where you can perform different actions related to SSH keys. To generate a new SSH key, click on the "Generate a New Key" button.
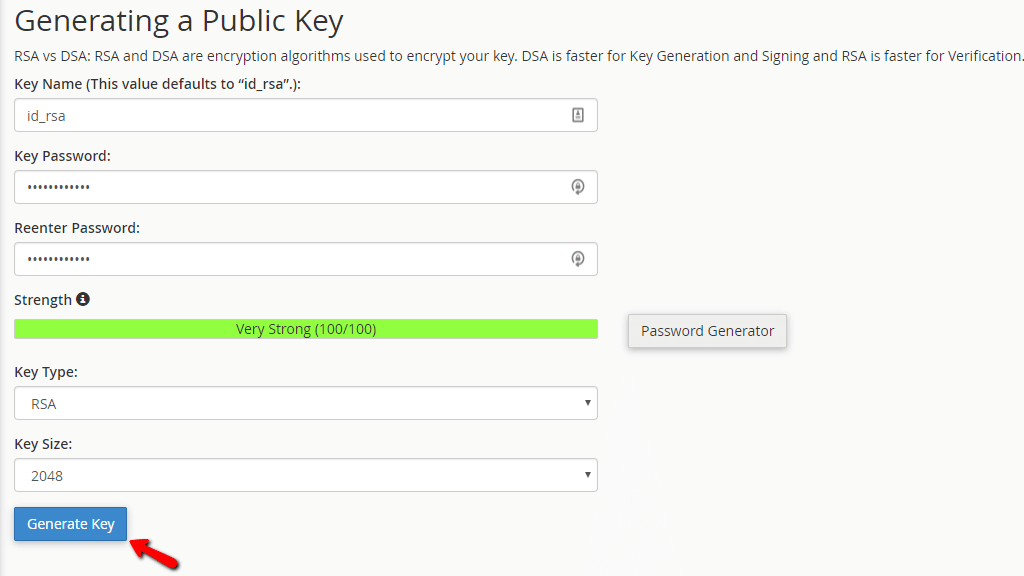
Enter a name for the key, define a password for the SSH key, choose the key type, and size. Once ready, click on the "Generate Key" button so cPanel can start generating your new SSH key.
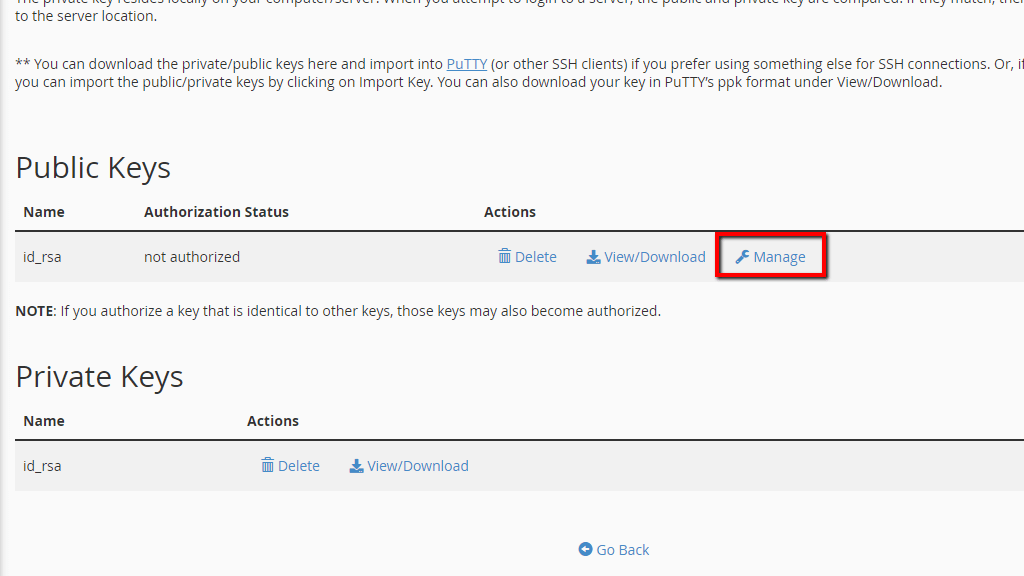
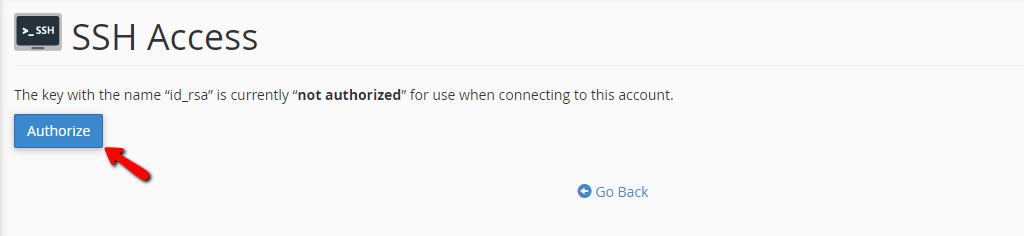
Authorizing SSH Keys
After generating a new SSH key, authorize it to activate it. To do that, click on the "Manage" link for the chosen SSH key. You will be redirected to a new page where the only option available is a single "Authorize" button, which you must click to activate the chosen key.
Managing Your Existing SSH Keys
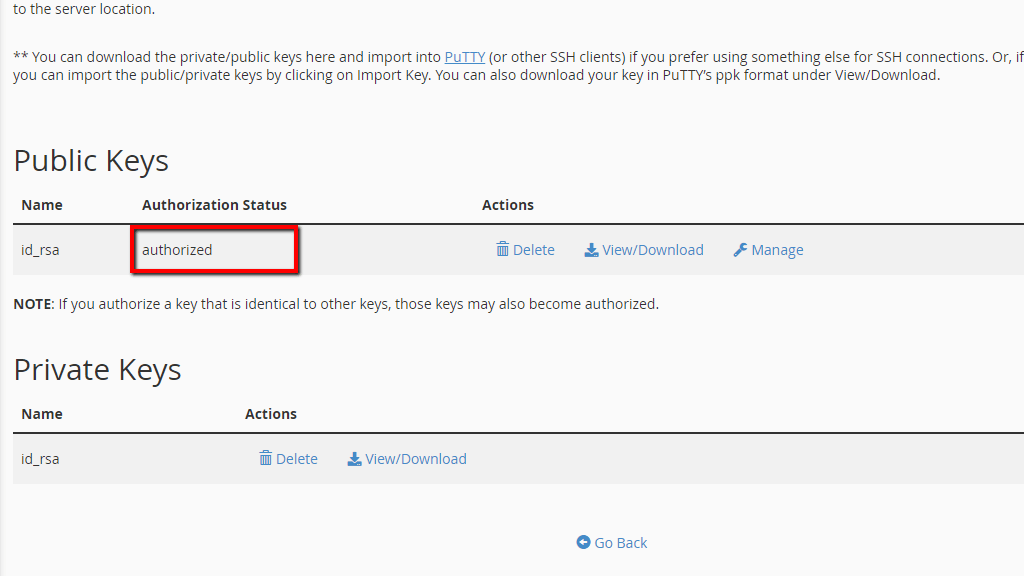
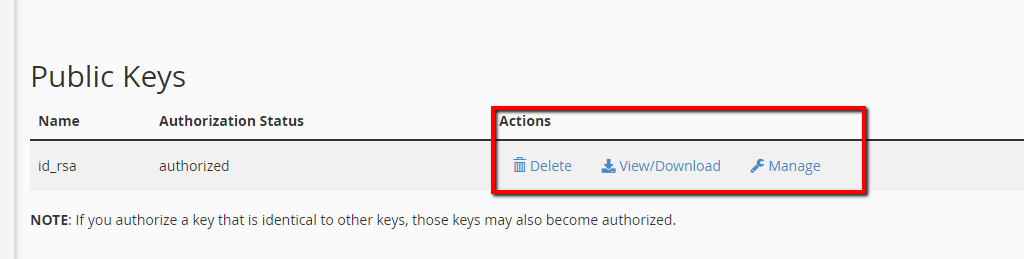
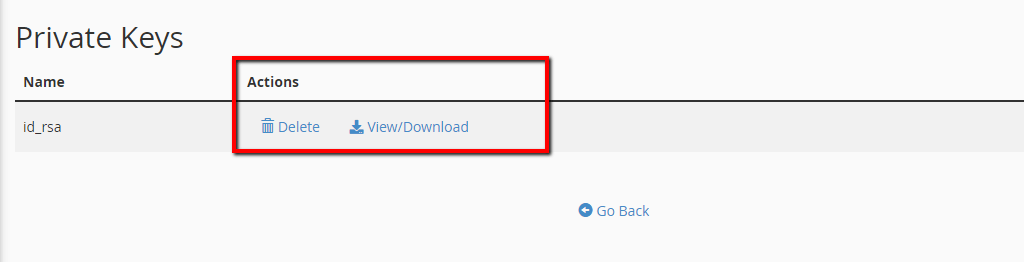
Your generated SSH key consists of public and private keys. On the default SSH keys management page, you will find two additional sections for managing your SSH keys. The first section, "Public Keys," contains all public keys generated by cPanel so far. For each key, you can perform actions such as delete, view/download, and manage. The second section, "Private Keys," contains all private keys you have generated. For each private key, you can perform actions such as delete and view/download.
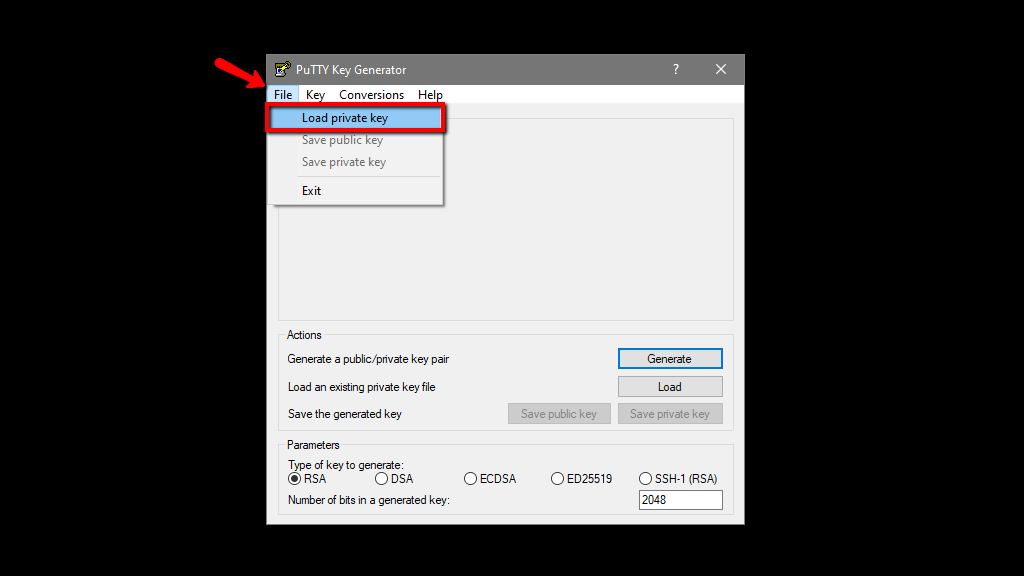
Importing SSH Keys into PuTTY
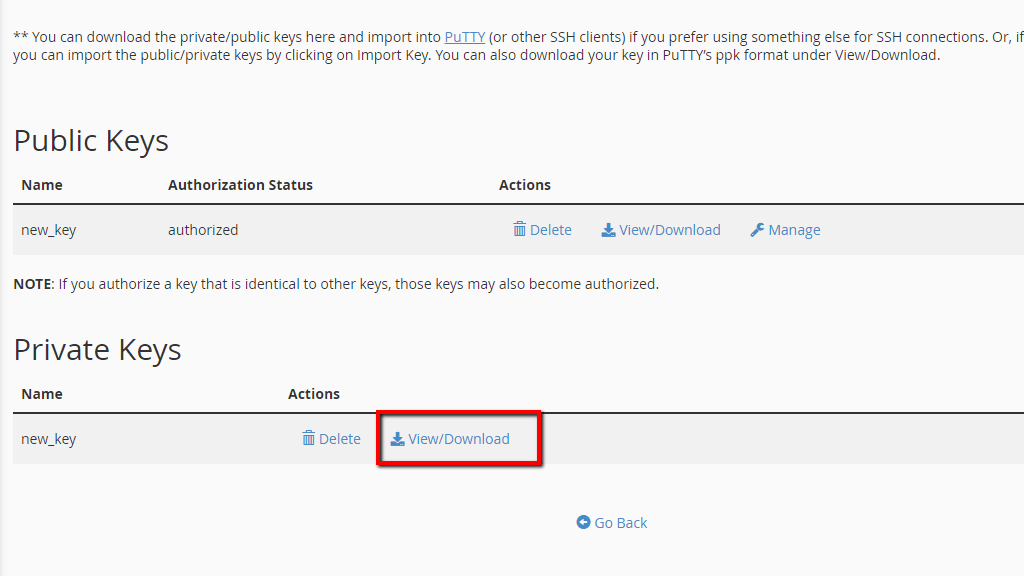
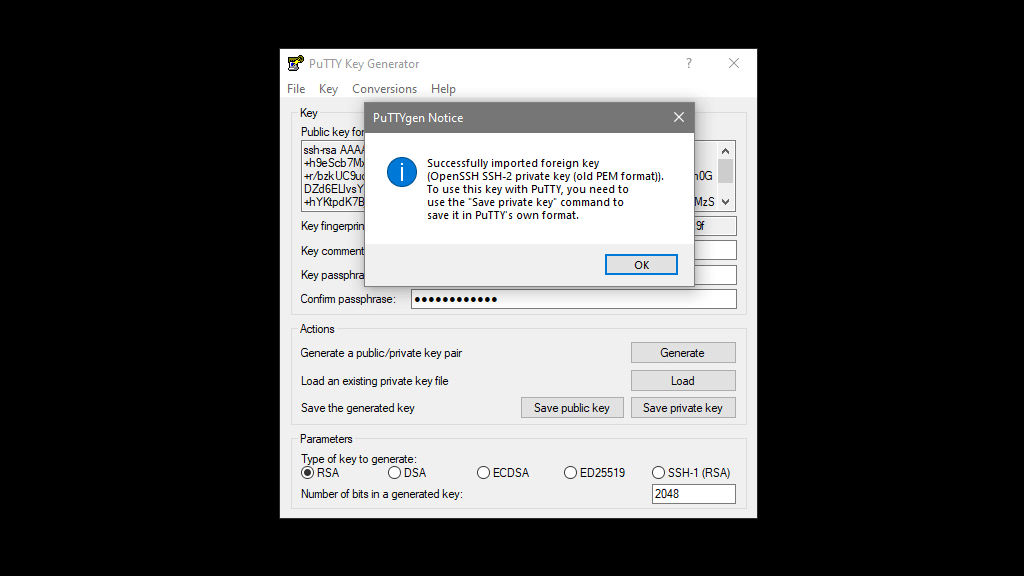
To import your SSH keys into the PuTTY SSH client, download the Private key from cPanel by clicking the "View/Download" link next to the private key you would like to download. Open the "PuTTYgen" application, access the "File" -> "Load Private Key" menu, and select the downloaded key from the file system of your local computer. If the selected private key has a passphrase, you will be asked about it. Finally, the key will be imported, and PuTTYgen will indicate that with an appropriate message. To finalize the process, save the imported key in PuTTY and access the session settings to configure the "Host Name (or IP address)" of the server you would like to connect to, and the SSH Port. Finally, click on the "Open" button to open the connection to the specified server.
Conclusion
You have now learned how to generate, authorize, and manage SSH Access keys for your cPanel Web Hosting account. Importing SSH keys into
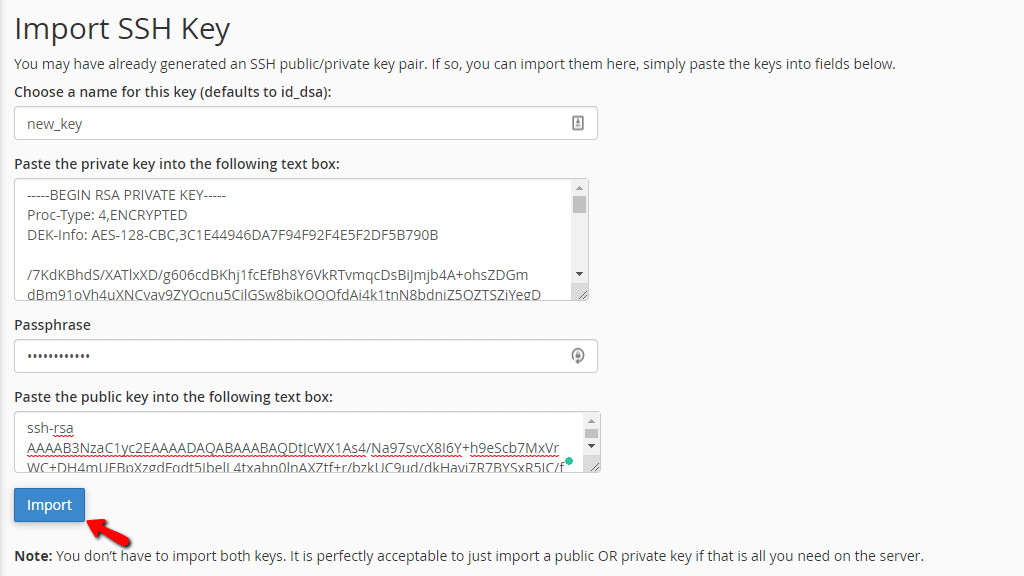
If you already have keys generated outside of cPanel that you would like to use with your cPanel account, you can import them using the "Import Key" option located at the top of the page next to the "Generate a New Key" button.
Managing Your Existing SSH Keys Once you have created an SSH key, you can manage it in a few different ways. As mentioned earlier, a generated key consists of both public and private keys. On the default SSH keys management page, you will find two additional sections for managing your SSH keys.
The first section is called "Public Keys," and it lists all of the public keys generated by cPanel so far. For each key, you can perform the following actions:
-
Delete: This will permanently delete the public key. Be aware that once a public key is deleted, it cannot be restored. Deleting a public key will not delete the private key associated with it.
-
View/Download: This option will display the key along with a "Download Key" button that will allow you to download the key.
-
Manage: This option is used to "Authorize" the generated public key.
The second section is called "Private Keys," and it lists all of the private keys you have generated. You can perform the following actions with each private key:
-
Delete: This will permanently delete the private key. Note that deleting a private key will not delete the public key associated with it.
-
View/Download: This option will allow you to download the selected private key and convert it to PPK format.
Knowing how to manage your SSH keys is critical when using them.
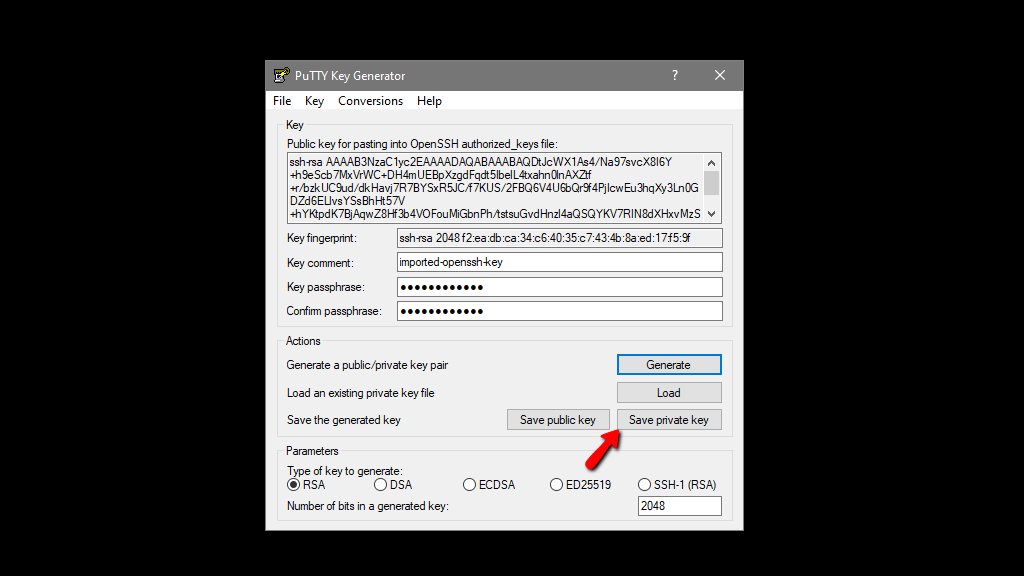
Importing SSH Keys into PuTTY Finally, we will show you how to import your SSH keys into the PuTTY SSH client. When you install PuTTY, you will get a few useful tools with it. To import your keys, start by downloading the private key from cPanel. Click on the "View/Download" link next to the private key you want to download.
Next, open the "PuTTYgen" application that comes with PuTTY. From there, access the "File" > "Load Private Key" menu, and select the downloaded key from the file system of your local computer. If the selected private key has a passphrase, PuTTYgen will ask for it.
The key will be imported, and PuTTYgen will display a message indicating that. To finalize the process, click the "Save private key" button. This will attempt to save the key into the PPK file format, so select a location for the key to be saved and retrieved if necessary.
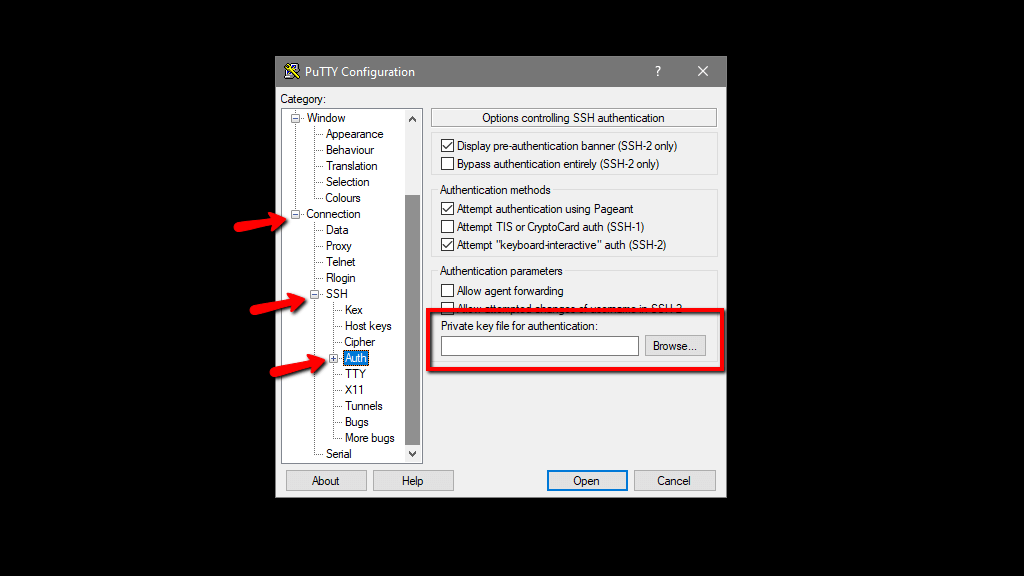
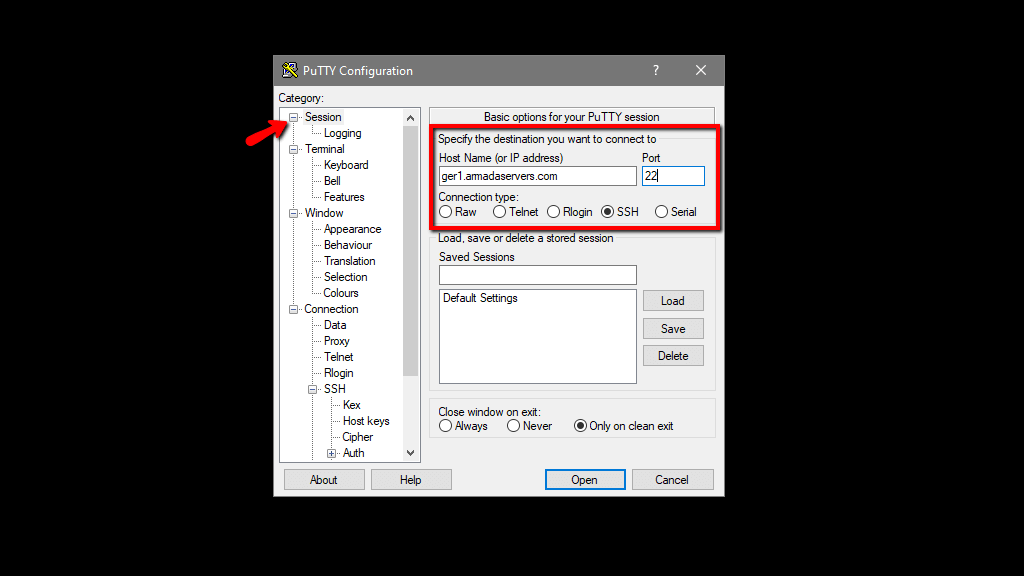
Once the key has been saved, close the PuTTYgen application and open the PuTTY SSH client. In the "Category" section, access the "Connection" > "SSH" > "Auth" section. Click on the "Browse" button and select the key you saved from the PuTTYgen application. Then access the "Session" category of settings to configure the "Host Name (or IP address)" of the server and the SSH Port. You can obtain this information via the "My Services" section of the Client Area. Finally, click on the "Open" button to establish the connection to the specified server.
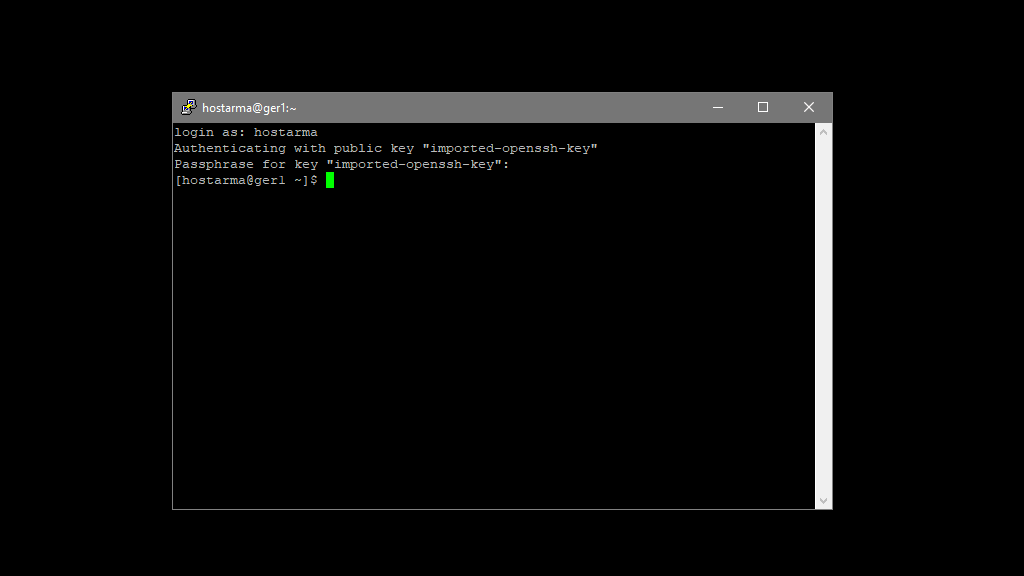
You will be prompted to enter your cPanel username and password if necessary. Then, if the key you used has a password, you will be asked to specify it, and finally, you will be logged into the SSH service for your Web Hosting Account.
That's it! We hope this tutorial has helped you learn how to manage SSH access keys for your cPanel Web Hosting Account.