

Installing the iRedMail Mail Server
iRedMail is a full-featured open-source mail server designed to run on various Linux distributions. In this guide we will walk through installing iRedMail manually and performing the necessary configuration.
You can also deploy iRedMail automatically by selecting the "iRedMail" image when creating a new cloud server.
Server requirements
- RAM: at least 2 GB, 4 GB recommended.
- Operating system: Ubuntu 20.04; Debian 11; CentOS Stream 8.
Make sure the server is in a clean state before installing iRedMail.
Installing on Debian / Ubuntu
1. Set up a fully qualified domain name (FQDN) for your server.
An FQDN is a complete domain name that is unambiguous and includes the names of all parent domains in the DNS hierarchy.
You can check the current FQDN with the command:
hostname -fThe result may look like this, for example:
mx.example.comThe FQDN is stored in the /etc/hostname and /etc/hosts files. In /etc/hostname, specify only the short host name; for example, if your FQDN is mx.example.com:
mxIn the /etc/hosts file, add the FQDN at the beginning of the list:
127.0.0.1 mx.example.com mx localhost localhost.localdomainCheck the FQDN again with the command:
hostname -fIf you still don't see mx.example.com, reboot the server.
2. Update Ubuntu:
apt-get update -y3. Change the server's host name to the email domain.
4. Download the archive with the latest version of iRedMail from the official website.
5. Extract the downloaded archive with the following command:
tar -xvzf 1.6.0.tar.gz6. Go to the directory with the extracted files and run the iRedMail.sh script:
cd iRedMail-1.6.0
chmod +x iRedMail.sh
./iRedMail.sh
The installation wizard will then start, letting you configure the mail server parameters or use the default settings.
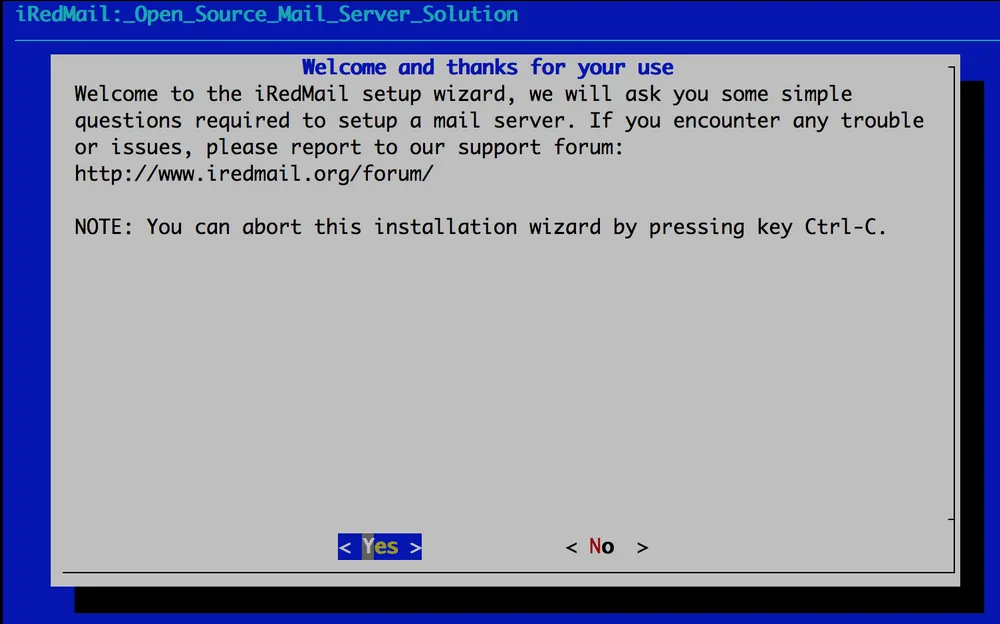
7. First, confirm that you want to start the installation:
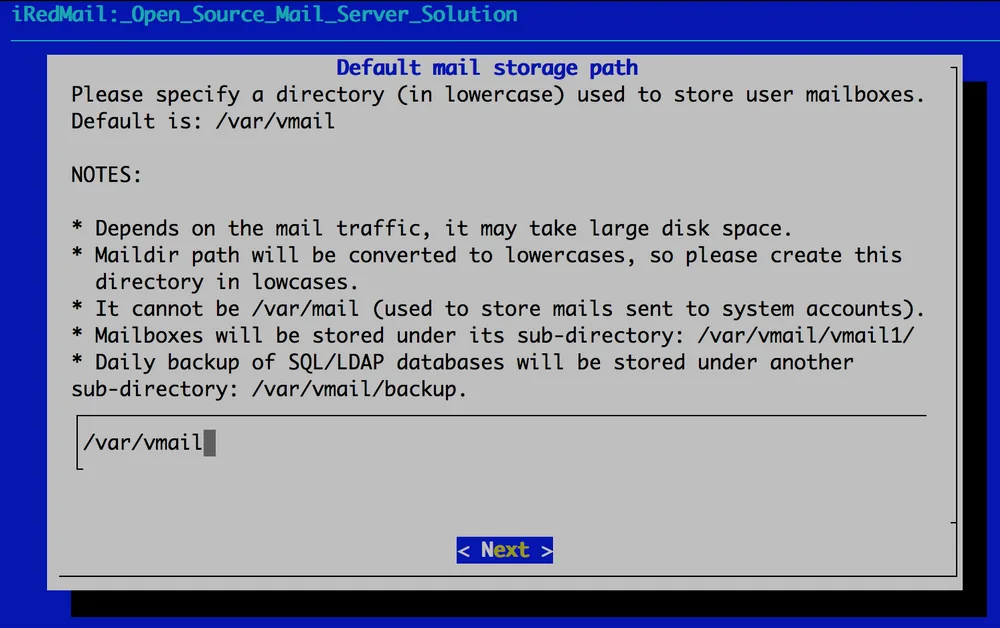
8. Choose where user mailboxes will be stored:
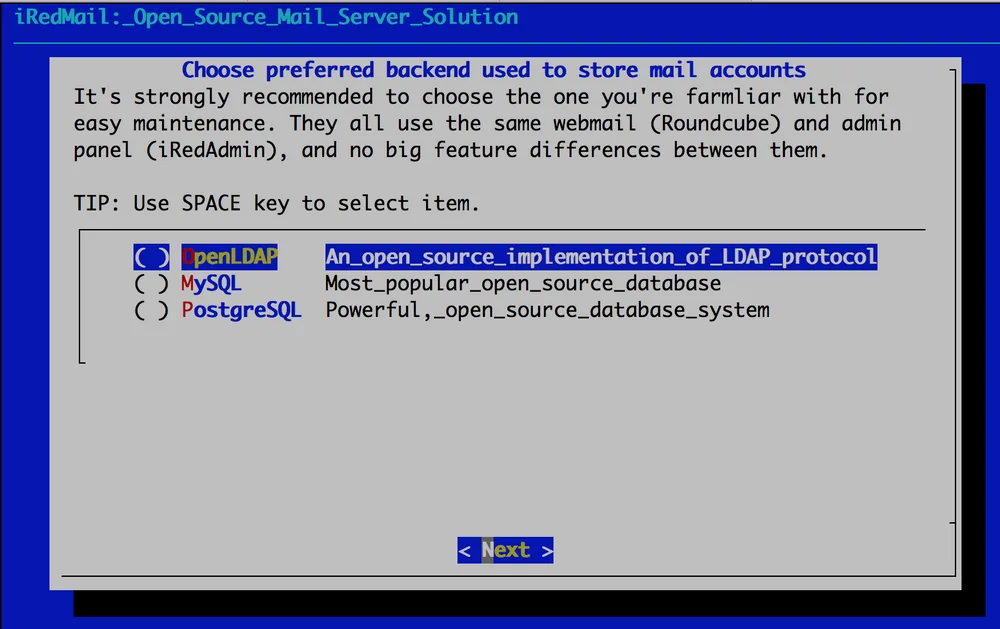
9. Choose the backend you prefer:
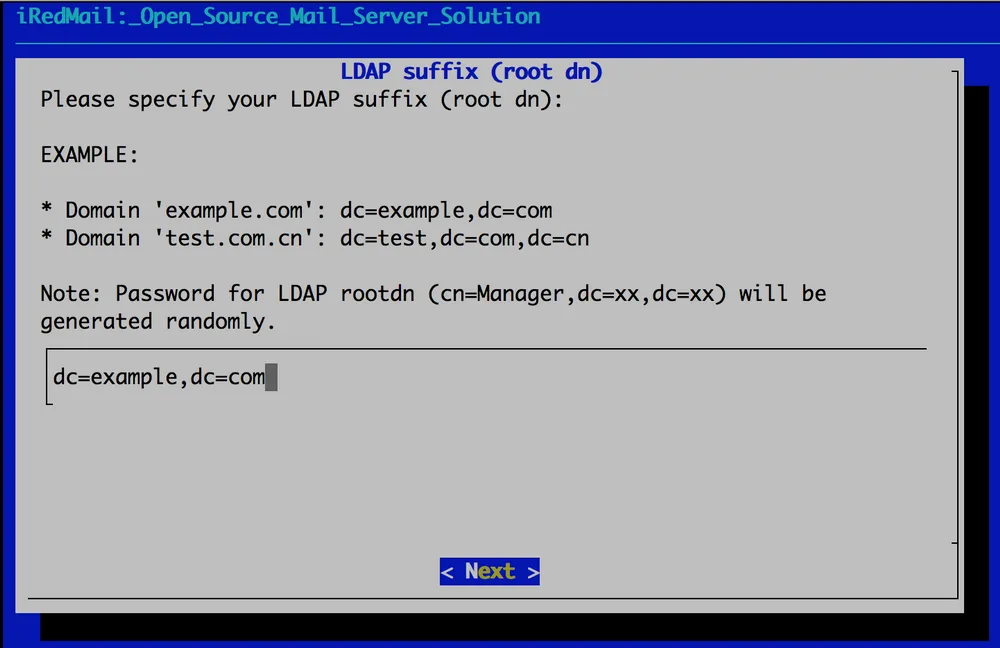
- If you choose OpenLDAP, you will be asked to specify an LDAP suffix:
- If you choose MySQL, MariaDB, or PostgreSQL, a strong password will be generated; you can find it in the /root/iRedMail-x.y.z/iRedMail.tips file.
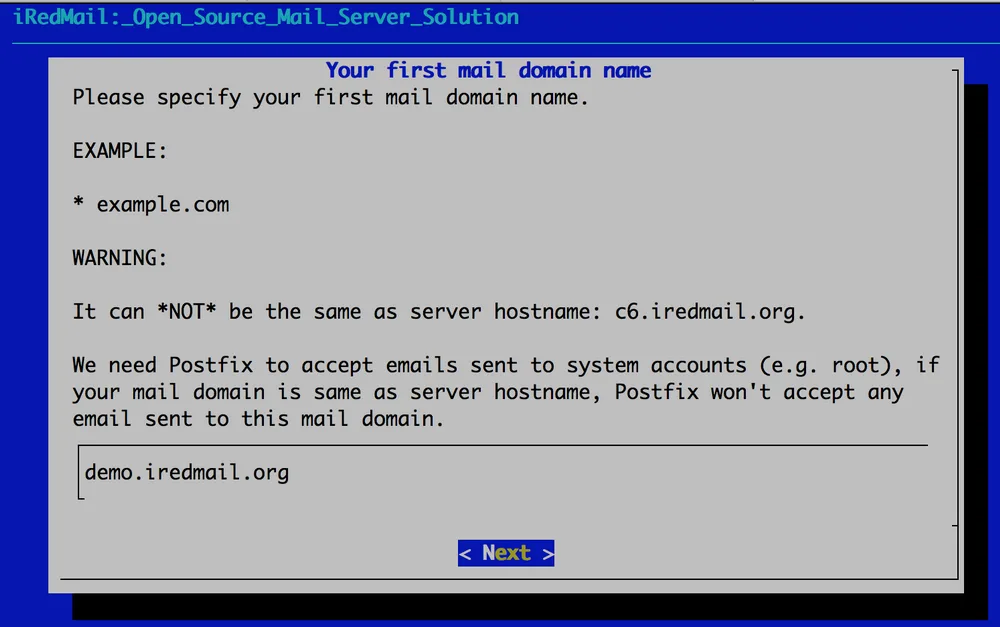
10. In the next wizard window, enter the domain name for your email. Note that you cannot use the server's host name as the email domain:
11. Set the administrator password:
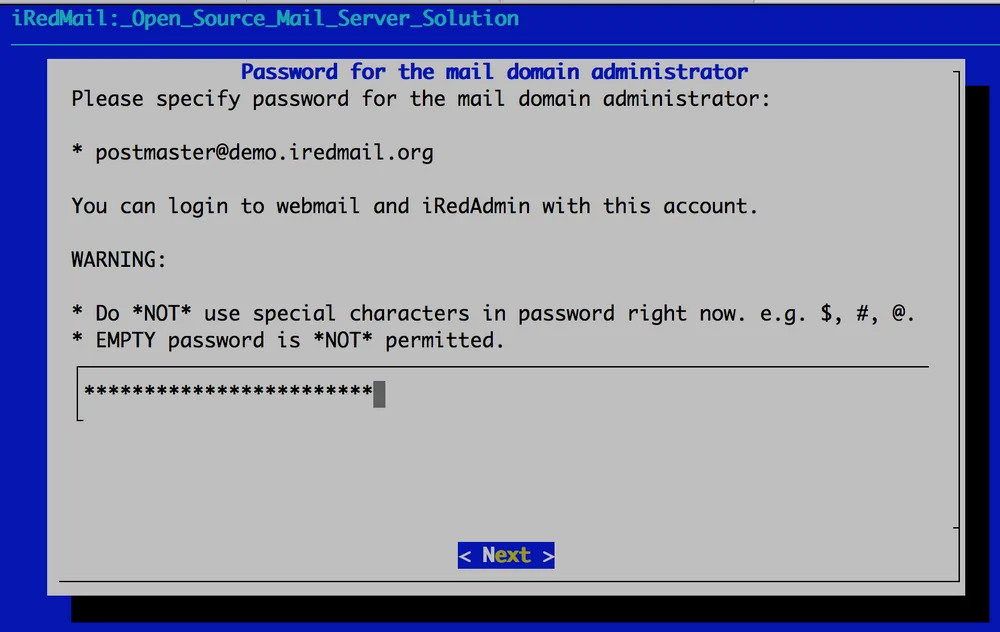
This account will be both the administrator and a mail user; with its credentials you can log in to the mailbox and to the iRedAdmin admin panel.
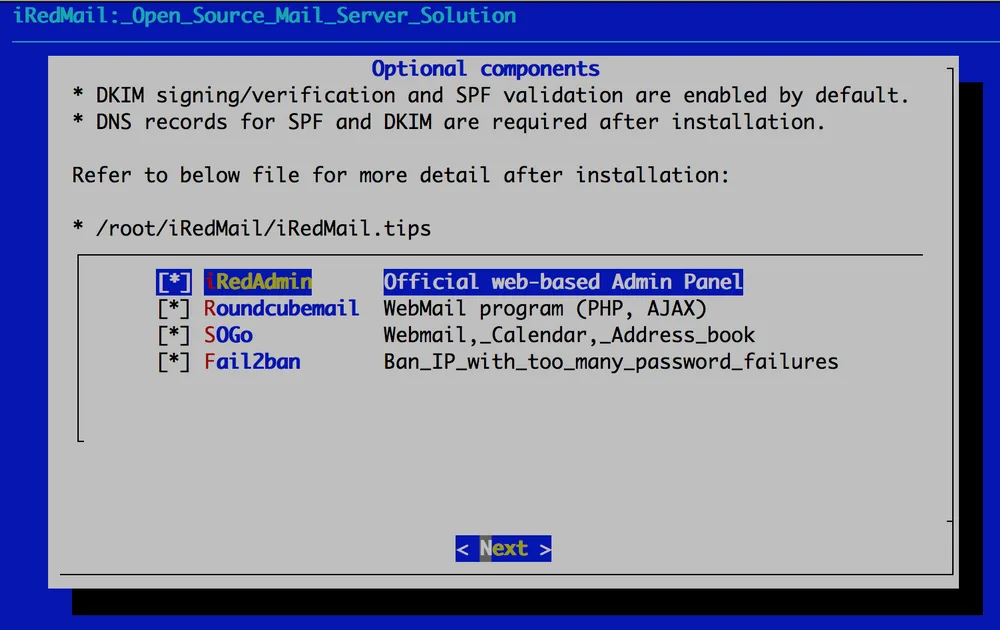
12. Select optional components if needed:
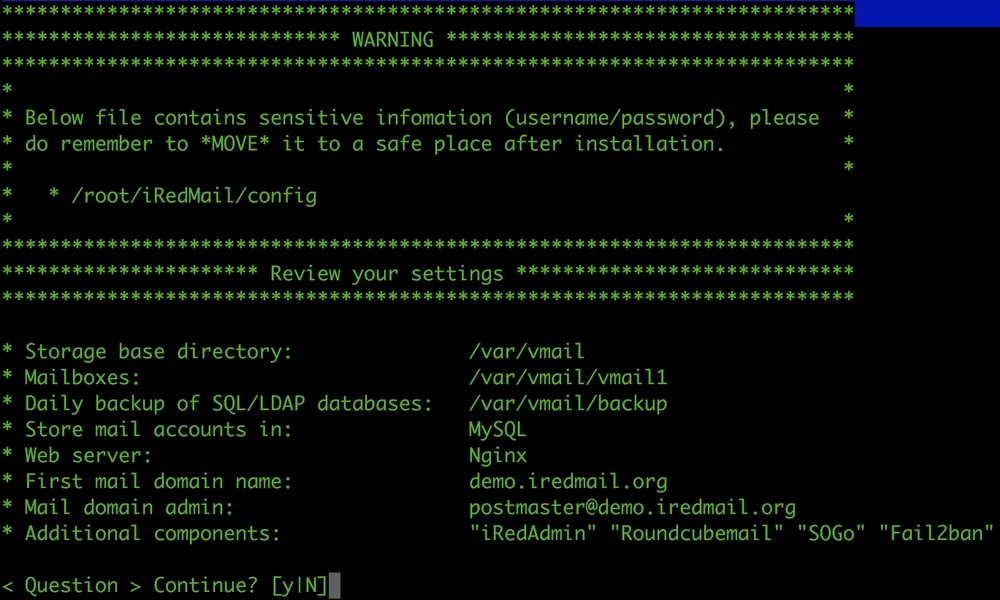
13. Accept the proposed configuration by entering y:
14. When the installation is complete, reboot the server.
After installation, all the necessary information, such as user passwords and paths to configuration files, can be found in the /root/iRedMail-x.y.z/iRedMail.tips file.
The optional components will be available at the following addresses:
- Roundcube Webmail: https://server_address/mail/
- SOGo Groupware: https://server_address/SOGo
- iRedAdmin admin panel web interface: https://server_address/iredadmin/
For more information and help with problems, see the project forum or iRedMail paid support.
Installing on CentOS / RHEL
1. Set an FQDN hostname for your server.
An FQDN is a fully qualified domain name that leaves no ambiguity. It includes the names of all parent domains in the DNS hierarchy.
You can check the current hostname with the command:
hostname -fThe result may be, for example:
mx.example.comThe hostname is set in the /etc/hostname and /etc/hosts files. In /etc/hostname, specify the short host name. For example, if your FQDN is mx.example.com, specify:
mxIn the /etc/hosts file, add the FQDN at the beginning of the list:
127.0.0.1 mx.example.com mx localhost localhost.localdomainCheck the FQDN again with the command:
hostname -fIf you don't get mx.example.com, reboot the server.
2. Disable SELINUX in one of the following ways.
- Method 1. In the /etc/selinux/config file, set SELINUX=disabled, then reboot the server.
- Method 2. Run the following command in the console; it disables SELINUX without rebooting the server.
setenforce 03. If necessary, enable the official repositories (epel, appstream, powertools).
4. Continue with the instructions for Ubuntu, starting from step 4.

