

Adding and Removing Disks
This guide is intended for servers running Linux operating systems.
Adding a Disk in the Control Panel
First, add a new disk in the control panel.
Please note that you cannot add a disk if a restore point has already been created on the server. In that case, you will need to delete the restore point first.
After the new disk has been added, follow the steps below to prepare it for use in Linux.
Preparing the Disk in Linux
Preparing a disk in Linux involves several steps:
- Creating a partition on the disk.
- Creating a file system.
- Mounting the disk for use, if needed.
- Adding an entry to the /etc/fstab file (if the disk should be mounted automatically at boot).
The steps below prepare the vdb disk. When running the commands, replace this value with the name of the actual disk in your system.
Creating a Partition
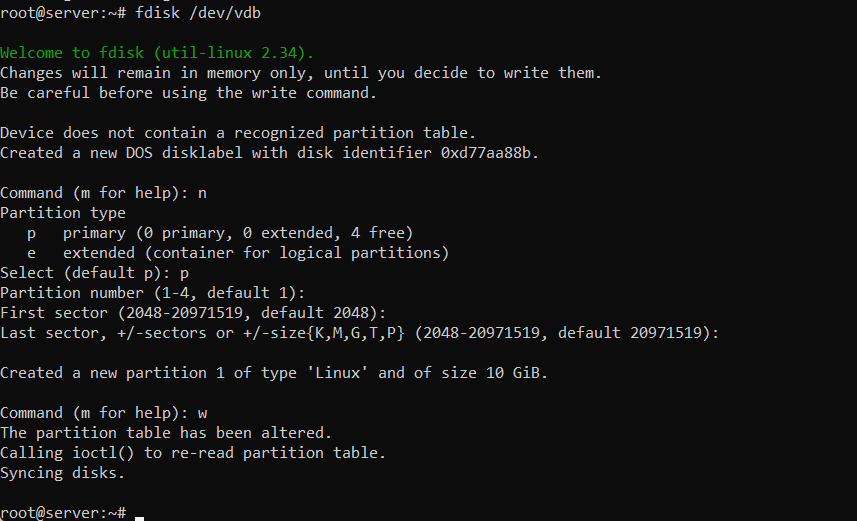
Use the fdisk tool to create a partition on the disk. Open the console and enter the following command:
fdisk /dev/vdbCreate a new partition by entering the n command. Then choose the partition type with the p command. Leave the other parameters at their defaults by simply pressing Enter. To save the changes, enter the w command.
Creating a File System
The next step in adding a disk is creating a file system on the new partition. Let's look at an example with the EXT4 file system. To create it, run the following command in the console:
mkfs.ext4 /dev/vdb1The file system is now ready to use.
Mounting the Disk
If you want to start using the disk right away, you need to mount it to a directory.
Different disks should be mounted to different directories. For example, if you have another disk, such as vdc, create a separate directory for it, such as disk3.
Create a directory with the following command:
mkdir /mnt/disk2Then mount the disk to this directory:
mount -o barrier=0 /dev/vdb1 /mnt/disk2You can now save files to the /mnt/disk2 directory, and they will be written to the new disk.
Adding an Entry to the /etc/fstab File
To keep the disk mounted to the directory after a reboot, run the following command:
echo "/dev/vdb1 /mnt/disk2 ext4 barrier=0 0 1" >> /etc/fstabThis command adds the required entry to the /etc/fstab file.
Your additional disk is now fully ready to use.
Removing a Disk
You cannot remove a disk if a restore point has been created on the server.
If the server has only one additional disk, follow these steps to remove it:
- Delete or comment out the disk entry in the /etc/fstab file:
nano /etc/fstab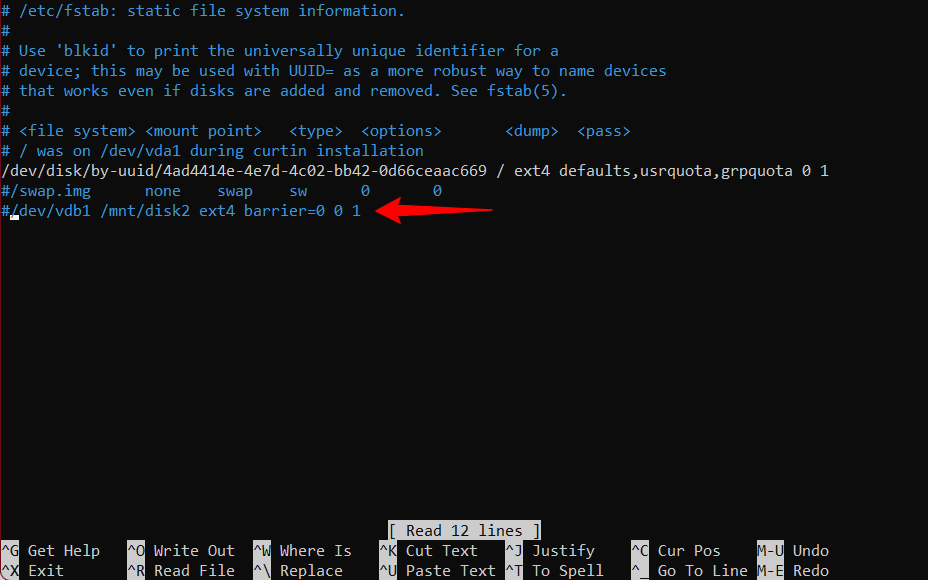
- Remove the disk in the control panel, in the "Configuration" section.
If the server has several additional disks and you want to remove one that is not the last, follow these steps:
- Delete or comment out the disk entry in the /etc/fstab file:
nano /etc/fstab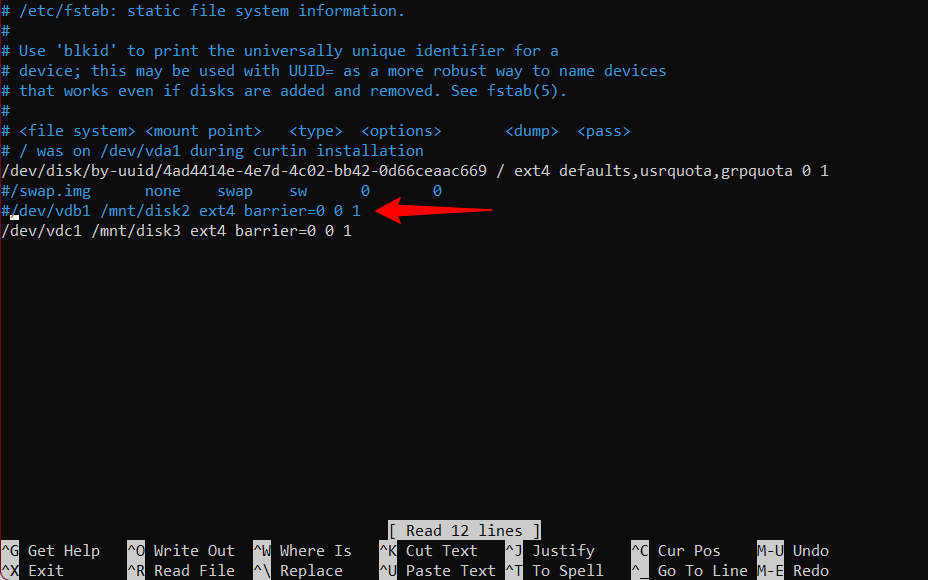
- Remove the disk in the control panel, in the "Configuration" section.
- Check the disk names in the system, for example with the lsblk command. You will see that the names have shifted by one.
For example, if you had the additional disks vdb and vdc and removed vdb, you will see the following:
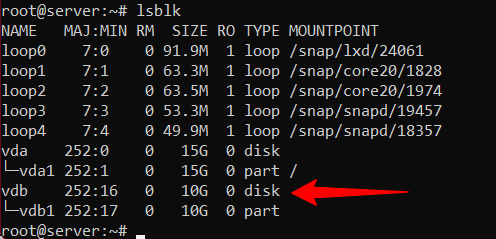
This is actually your third disk, vdc, which was mounted to the /mnt/disk3 directory.
- Mount the disk to the same directory using its new name (in this case, vdb1):
mount -o barrier=0 /dev/vdb1 /mnt/disk3- Make the corresponding changes in the /etc/fstab file:
nano /etc/fstab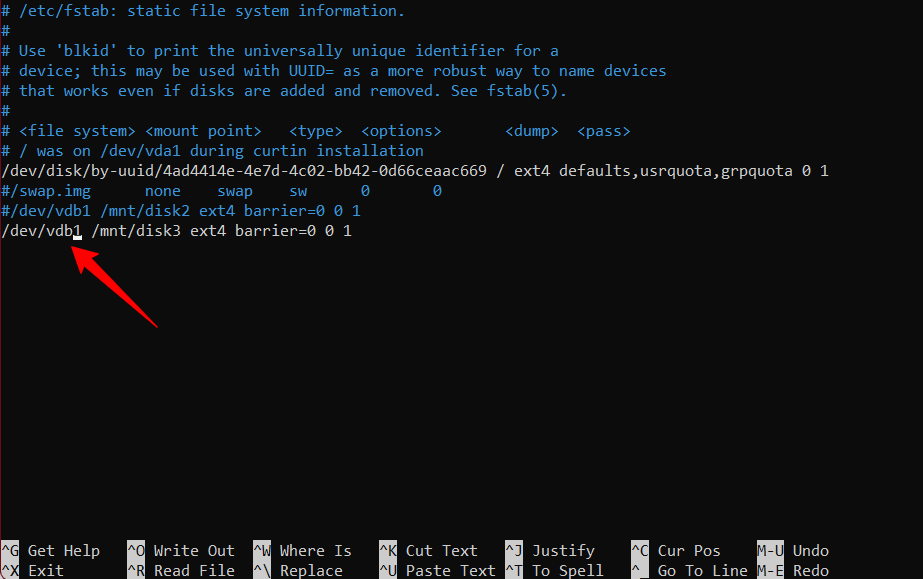
If you have several disks, repeat these steps for each of them.
- Reboot the server.

